Thursday, April 24, 2014

Grilled Brie, Raspberries and Chocolate Chips

It’s the week after Easter and I still have a hankering for chocolate.

This year's haul from the Easter Bunny. 
 Chocolate kisses, Kinder-Surprises, chocolate cupcakes - this was a chocolate-filled weekend! I’m usually more of  a salty than sweet snacker but I do love a chunk of  chocolate bunny with a tall, cold glass of milk. 

 I’m not quite ready to put it away yet, so I consulted the  Internet orbs and found a way have my chocolate and eat  it too – in a whole new kind of grilled cheese sandwich,  combined  with some silky, creamy brie and sweet  raspberry jam.

 Chocolate and Grilled Cheese?!

 The only thing crazier than the idea of this sandwich would  be not to try it.

 So try it I did.  A delicate balance between the sweet  chocolate and creamy cheese needs to be struck in order  to make this sandwich work and it took me two tries to get  it right. I know...life is rough when I have to eat this sandwich twice. Sigh.

I had never made such a sweet sandwich before and I went big with my first attempt. Very big and very, very sweet. It was basically a chocolate fondue sandwich, and that may not be an issue for you, but for this sandwich to really shine, the brie deserves equal time in the spotlight. I toned it down for Version 2 and the result was nothing short of grilled cheese and chocolate miracle.

It's hard to go wrong with good brie.
You will need: 

Sourdough or rye bread
Triple Crème Brie, sliced thickly
Raspberry Jam
Chipits’ Baking Chocolate, broken into pieces or Milk Chocolate Chips (or you could sacrifice bits of your Chocolate Bunny to this delicious cause)
Butter (2-3 Tbsp)

How to:

1-Spread one slice of bread with a thick layer of raspberry jam. Cover the entire piece of bread, right up to the crust.
2-Add your chosen chocolate to the jam side: either the shards of baking chocolate or the chips. For best results, use just one kind of chocolate.
3-Arrange the slices of brie on the other piece of bread and combine the two.
4-Pre-heat your skillet on low and melt the butter before grilling the sandwich 3-4 minutes per side.
5-Flip and grill until the outsides are golden brown and the insides are melted. Some oozing of chocolate or brie is to be expected.
6-Slice and enjoy!

Don't go crazy with the chocolate! Less really is more.
The result: rich, sweet, velvety and ridiculously decadent!

The chocolate and brie melt so well, they are barely contained within the bread. The raspberry jam adds a pinch of tartness and I love brie with anything.  When I just used the chocolate chips, I could actually taste all the flavours of all the ingredients instead of just tasting melted chocolate and grilled buttery bread.  The toned-down version is still plenty sweet but doesn’t overdo it.  It’s still a grilled cheese sandwich at heart.
A grilled cheese and chocolate miracle.

That said, this grilled cheese gives you permission to skip the dinner sandwich and go straight for desert. Just add a tall, cold glass of milk.

Trust me, you’ll need it. 


Thursday, April 17, 2014

Marghertia Pizza Grilled Cheese

I love pizza almost as much as I love sandwiches.

The combination of melted cheese, chewy crust and meaty toppings get me every time. Note that I said meaty toppings.  As a reformed picky-eater, I have come a long way in trying and liking many new foods but try as I may, I can’t quite seem to like vegetables on my pizza.

I know it’s weird. People swear I’m missing out on so much.  If I judged pizza on looks alone, I would be all for the beautifully topped Hawaiian or Vegetarian pizzas, but they just don’t do it for me taste-wise. Give me a classic pepperoni, or one topped with multiple kinds of meat (like ham, salami and bacon), a cold beer and a stack of napkins and I’m all set for pizza night.

Who knew Scotland would have the best Margherita pizza?
The one exception to my meat-only pizza preference is the Margherita Pizza.  It’s the simplest pizza out there: basic tomato sauce, mozzarella cheese, fresh basil and sometimes chopped cherry or grape tomatoes. Nothing that fancy  but when it’s baked fresh on a thin crust, with the cheese hot and bubbling, mixed in with the invigorating scent of basil, Margherita Pizza has the power to trump my cherished pepperoni any day.

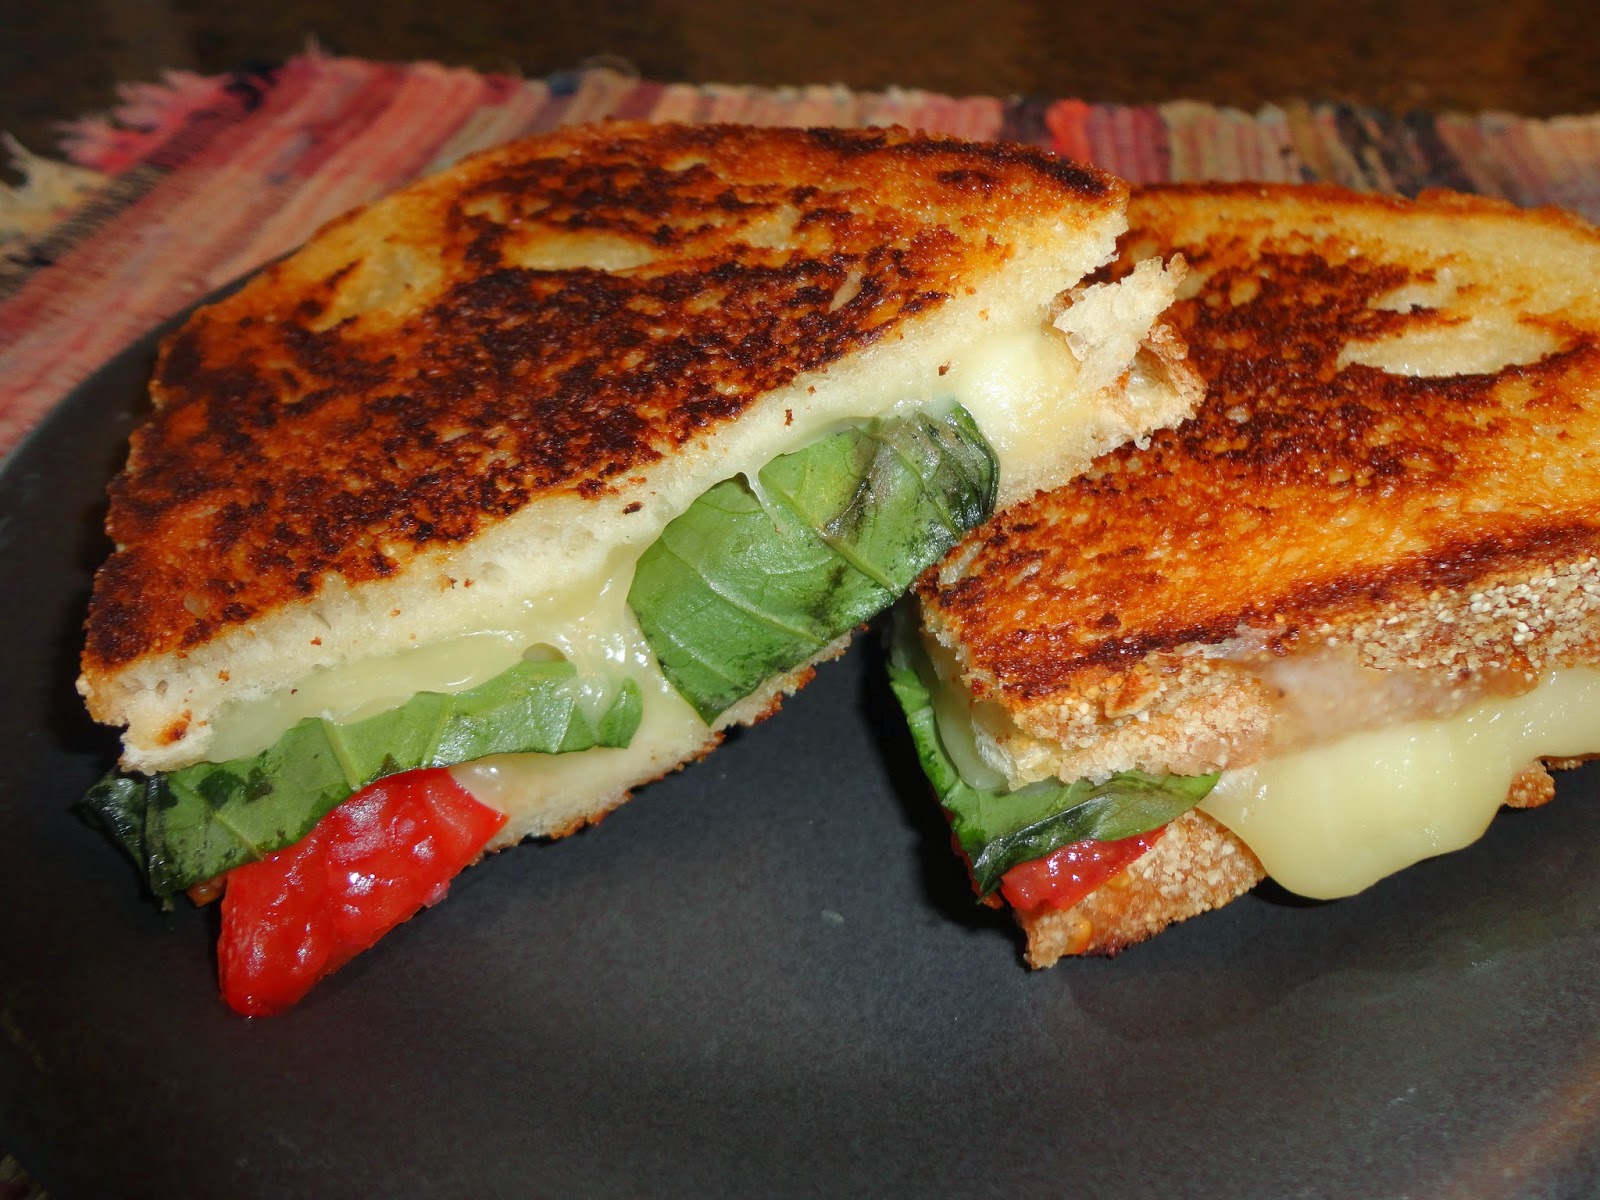
Week Two of National Grilled Cheese Month inspired me to forge a bond between two of my great loves - pizza and sandwiches – in trying out a Margherita Pizza Grilled Cheese. The result was molto bello!

As for any good pizza, use simple, sweet, fresh ingredients.
You will need:

Sourdough bread or Italian baguette
Slices of mozzarella cheese
A handful of grape tomatoes, sliced
2-3 medium leaves of fresh basil
Butter (Garlic butter would be excellent for this sandwich)
A skillet, lid and spatula
Spicy pizza oil for dipping


1-Spread the butter on the outsides of the bread.

2-Place the cheese slices, tomatoes and basil on the non-buttered side of one bread slice.

3-Cover with another layer of cheese (this ensures the sandwich and all the fillings will melt together). 


Layering the cheese is key for maximum melting.
4-Assemble the sandwich with the other piece of bread, buttered-side out.

5-Place the sandwich carefully in the middle of the skillet on medium heat.

6-Cover with a lid and let it grill 4-5 minutes (remember: low and slow) before carefully flipping it over. Try not to lose any tomatoes in the flipping process!

7-Press down on the sandwich with the spatula as the second side grills and the cheese begins to melt everything together.

8-Remove from heat, slice and serve with some spicy pizza oil for dipping.

Spicy pizza dipping oil and a herb garden view!
What I enjoyed most about turning one of my favorite pizzas into a sandwich was how each bite was a different surprise: a juicy mouthful of grilled tomato, a sweet nibble of basil leaf, slightly crunchy from the heat, or a warm bit of melted mozzarella. No ketchup for this sandwich; spicy pizza oil is the appropriate condiment for this pizza-turned grilled cheese creation.

Any kind of pizza would make a tantalizing grilled cheese incarnation, so I challenge you to forego the pizza delivery one night and get creative with the pizza-sandwich possibilities instead. Just as I was pleasantly surprised to find the best Margherita Pizza in Scotland, of all places, you may surprise yourself with what you create right at home.

Margherita Pizza Grilled Cheese


Pizza Postscript:

The best Margherita Pizza I’ve ever had was at Di Maggio’s, in Glasgow, Scotland.  Sit on the patio outside and admire the view of the Modern Art Gallery across the street while you eat.

My Top 3 Pizza Places in Edmonton are:

1-Millcreek Pizza – Just south of the Whitemud, this is a little gem of a neighborhood pizza place. Their menu has all the classics, plus some India-spirations, like Butter Chicken, Shahi Paneer and the Trucker (pepperoni, ham, salami, Italian sausage and jalapeños!). The pizza is exceptional and the service is lovely; we order from them so often, they recognize us and treat us like family.

2-Parkallen Restaurant – The Mediterranean and Lebanese cuisine of this place is hard to beat but the pizza is truly legendary.

3-Royal Pizza – I’ve included this place mostly for sentimental reasons as it’s where my husband and I had our first official date. We met halfway between our places at the Calgary Trail location and split a large pepperoni pizza. True love at first pizza slice!


Thursday, April 10, 2014

Classic Grilled Cheese and Tomato Soup

The world of the Grilled Cheese Sandwich is an exciting place to delve into.  On one hand, it’s filled with passionate experimentation and a fearless sense of ‘what-else-can-we-try?’ and on the other hand, there is a fierce loyalty to keeping it simple and classic. 

So again I ask you, where do I begin? 

And I find myself answering with a yet another question: why not start at the modest and humble beginning?

The Grilled Cheese Sandwich can be traced back to the 1920s, but it wasn’t until the Great Depression that it really took off in popularity. When cheap bread, processed cheese and a little heat were combined, people found they could enjoy a tasty, filling meal when good food was often very hard to come by. The military soon discovered that grilled cheese was one of the easiest and least expensive meals to mass-produce and when it was served along with tomato soup, it allowed them to get in the recommended Vitamin C in-take.  And that’s how it all began.
Simple and delightful grilled cheese and tomato soup.

It’s pretty amazing how a simple meal meant to provide the bare minimum in taste and nutritional value has really stood the test of time. To kick off National Grilled Cheese Month, I will pay homage to this great sandwich in its most simple, definitive form – grilled straight up on a skillet and served fresh with a side of hot, homemade tomato soup. 

I’ve spent a lot of time researching tomato soup recipes and there are as many different versions as the various kinds of grilled cheese, which makes perfect sense.  I made a tweaked version of a Jamie Oliver recipe and it paired beautifully with the sandwich.  Since timing is important when you’re preparing more than one dish, I recommend getting the soup started first, then making the sandwich. 

Tomatoes, carrots, onions and celery make a great soup.
Classic Tomato Soup:

1-2 onions, coarsely chopped
1 handful of chopped baby carrots (no peeling required!)
2-3 stalks of celery, chopped
1 carton of vegetable stock (chicken stock works well too)
1 19 oz can of stewed tomatoes
1 container of grape tomatoes, chopped
1 tbsp minced garlic
2 tbsp olive oil
Fresh basil leaves
Salt and pepper

Preparation:

1-In a large soup pot on medium heat, combine the oil, garlic, onion, carrots and celery and sauté for 10-15 minutes, until the veggies have softened.
2-Add the stock and all the tomatoes.
3-Bring the soup to a boil, then reduce the heat, cover and simmer for 10-15 minutes.
4-Add some fresh basil during the last few minutes of simmering.
5-Using an immersion blender, puree the soup to your desired texture (smooth vs. chunky).
6-Simmer on low until ready to serve topped with fresh basil leaves and the grilled cheese sandwich.
Dijon mustard really enhances this sandwich.

While the soup is simmering during Step 3, start making the Classic Grilled Cheese Sandwich using:

Sliced sourdough bread
Slices of cheddar and mozzarella cheese
Dijon mustard (optional but I highly recommend it!)
Butter

Preparation:

1-Pile the cheese on one half of the bread.
2-Spread a thin layer of mustard on top of the cheese.
3-Spread the butter on the outsides of the bread and carefully place the sandwich on the pre-heated skillet.
4-Cover with a lid and let it grill.
5-Be patient! The trick to stove-top grilling is low and slow to ensure the cheese melts inside and the bread doesn’t burn outside.
6-When you start to hear the bread and cheese sizzle (about 3-4 minutes), it’s time to carefully flip it over. The grilled side should be a nice golden colour.
This sandwich needs low heat and lots of grilling time.
7-Press down on the sandwich with a spatula to ensure maximum cohesion of the cheese and bread.
8-Keep flipping and grilling the sandwich until the cheese is melted and the bread is golden brown.
9-Remove from heat, slice and serve with the tomato soup.

There’s a reason why this soup/sandwich combination is so timeless: it’s warm, savory, and so delectable!

I’ve sometimes found tomato soup to be bland and one-dimensional but this recipe really delivers on the flavor. I like the slightly chunky texture of the pureed vegetables and its gorgeous orange colour.  Using fresh herbs in any recipe really adds an extra-special element and the fresh basil (literally) tops this one; it makes it so crisp and sweet. Really lovely. 


Golden delicious: grilled cheddar and mozza cheese.
As for the sandwich, the Dijon mustard was a great addition to the gooey, delicious, melty inside. It gave it a bit of sweetness and tang, plus it’s basically impossible to go wrong with cheddar and mozza. Sourdough bread grills so well and I love that audible crunch when I bite into it.  Definitely don’t scrimp on the butter since it adds that special sheen and eliminates stickage during the grilling process.


This meal sticks to the basics - good bread, good cheese and hot soup - and it’s a great way to dive into the Grilled Cheese realm. There will be lots of experimentation this month, I guarantee it.  

But right here and now, somethings are just too good to mess with.

If it's not broke, don't fix it!

Grilled Cheese Links:


Wednesday, April 2, 2014

National Grilled Cheese Month - A Teaser

Grilled Cheese is sheer sandwich excellence.

The concept of cheese – any cheese – on beautiful bread, grilled to buttery, golden, melted, oozing perfection is simple and brilliant.  It’s messy, melted goodness is appealing to even the most picky of eaters, like I was as a kid.  It’s still a favorite among grown-ups – especially when fancy grown-up cheeses like Brie or Gruyere are the ones to be grilled.

A grilled cheese sandwich comforts, satisfies,  delights and inspires creativity like no other kind of sandwich. In my research, I've  bookmarked countless pages of grilled  cheese recipes, utterly mesmerized by  beautiful images of the melted cheese spilling  forth from the crispy, golden bread, like a  welcome banner, each more mouth-watering  than the last. It’s exciting,
overwhelming and  absolutely impossible to do justice to this  idolized sandwich in one or two
blog posts.

A good skillet is a must for stove-top grilled cheese.
A great tool to invest in is a small panini grill.
Seriously – it’s hard to even know where to begin!

So I’m beginning at the start of the month, which is fitting since April has actually been declared National Grilled Cheese Month. No, it’s not an April Fools thing, it’s true! There’s even a Grilled Cheese Invitational in Los Angeles on April 12, also known as National Grilled Cheese Day, where amateur and professional chefs come together to battle it out for bragging rights and Grilled Cheese Supremacy. Who knew this little sandwich could evoke so much in so many?

Throughout the next few weeks, I will be sharing my favorite grilled cheese finds - some old, some new, some weird but all wonderful.  I have lots of ideas but I’m also extremely open to hearing from you, my fellow Grilled-Cheese Connoisseurs.  Feel free to comment or message me any of your ideas, tips or feedback and we will celebrate this amazing sandwich together!

Here’s a tease of some of what’s to come:

Brie...Cheddar...Bacon...Sourdough...Apples...Mozzarella...Potatoes...Jalapenos...Gouda...Tomatoes...Baguette...Raspberries...Onions...Classic...

April is shaping up to be a great month.

Grilled Cheddar, Turkey and Apples. 

Monday, March 31, 2014

Peanut Butter and Jam Stuffed French Toast

Sandwiches are Beautiful would not be a true sandwich blog without a Peanut Butter and Jam post.  Since my peanut allergies prevent me from trying this classic sandwich, I’m proud to present the following post by my friend and fellow food blogger, Caroline Lyster. Enjoy!

Peanut Butter and Jam: the early stages.
I’m not usually a sandwich person, but I couldn't say no when Erin asked me to write a post for her blog.  Luckily, the sandwich she had in mind for me is one of the few that I absolutely adore: Peanut Butter and Jam.

Whether you’re partial to jam, jelly, honey, or bananas, the key is mixing something sweet with the salty goodness that is peanut butter (or another nut butter if you are so inclined).  It’s easy to make, and pretty healthy if done the right way (Protein packed peanut butter (in moderate quantities)! Whole grain bread!).  And, of course, it’s just flat out delicious.

Because PB&J is so easy to make talking about the sandwich itself would not be a very long post (PB on one side, J on the other…consume and enjoy).  So I decided to get creative, and make my childhood lunchtime staple into something better served with a mimosa in hand: stuffed French toast.

French toast was another staple at my house growing up: we used to get lots of homemade bread and rolls from my grandmother, and these tend to go stale faster than your average store bought loaf.  The solution was simple: soak the slightly stale slices in a custardy mixture of eggs, milk, sugar, and vanilla (allowing them to get moist and flavourful), then fry in butter (allowing the outside to get crispy while the inside remains creamy), and smother in maple syrup.  For stuffed French toast the basic method remains the same…the only thing you do differently is make your slices of bread into a sandwich before you soak them!

PB&J Stuffed French Toast needs:

-bread of choice, 2 slices per sandwich (it’s okay if it’s a little stale)
-peanut butter (my personal preference is for crunchy)
-jam of choice (strawberry is the classic)
-4 eggs
-1 cup milk
-2 tablespoons brown sugar (or any other sweet ingredient…syrup would work just as well)
-1 tablespoon vanilla
-a dash or two of cinnamon (if you’re so inclined)
-butter (to keep the French toast from sticking to the pan)
-a large frying pan

Optional…taking direction from Chef Michael Smith, I chose to crust my stuffed French toast with some oatmeal (making the outside extra super crispy).  If you want to do this you’ll also need one or two cups of rolled oats.

Crusted with oatmeal, ready for the frying pan.
How to:

1) Heat the pan that you will be using; medium is high enough.  You don't want the pan to be too hot or the outside of your sandwich will burn before the inside gets warm and creamy.

2) Make the PB&J sandwiches: peanut butter on one side, jam on the other (or, if you’re a true peanut butter lover, peanut butter on BOTH sides with jam in the middle).

3) Mix the eggs, milk, sugar, vanilla, and cinnamon in a large bowl.  Dip the sandwiches in the eggs mixture

If you've decided to crust your sandwiches with oatmeal à la Michael Smith, do this after they've been soaked in the eggs and milk.

4) Melt the butter in your frying pan, then add the sandwiches.  Fry slowly (be patient!) until they are golden brown, then flip them over and do the same on the other side.

That’s all there is to it…your stuffed French toast is now complete!  If you’d like, you can top them with syrup to complete the brunch effect, but they’re just as delicious without.

PB & J Stuffed French Toast: a new twist on a classic sandwich.
The great thing about this particular recipe is that once you've got the method down you can really stuff anything you want into your French toast…it doesn't have to be PB&J!  Chef Michael suggests mixing jam with cream cheese and using this as a filling and as a cheesecake lover,
I am definitely going to give that a try.  You can also experiment with other combinations of nut butter/sweet filling…almond butter with honey perhaps, or Nutella with bananas!  The possibilities are endless, and delicious!

For more information, check out Michael Smith's recipe and video.

Caroline Lyster is a graduate student with far too much free time on her hands, most of which she spends in the kitchen. As of right now she lives in Montreal, but now that she has finished her Masters she will soon be off to start a new adventure in a new city (with her giant box of cookbooks in tow). She is the author of Cooking=Love, though the blog is currently on hiatus as she has been quite busy finishing her thesis...she's done now, so be on the lookout for new posts featuring delicious (and mostly healthy) recipes, as well as little tips and tricks to get you cooking more often!


Tuesday, March 25, 2014

Thinking Outside the Bread Box - The Bagel

Fresh from my inaugural visit to the New York Bagel Café, I am inspired by bagels and their sandwich-making possibilities!
  
Toasted, untoasted, with cream cheese, jelly, butter or bare, open or closed faced - what I love about bagels is how limitless they are!

Check out any bagel shelf of any bakery and chances are you won’t see just one kind of bagel - there’s whole wheat, sesame, cinnamon-raisin, pumpernickel, poppy-seed, onion...full-sized or mini...assorted. It’s so hard to choose just one kind!

Exquisite Hendrickson Bagels!
Thankfully, the Everything bagel takes care of that. 

With a crispy topping of poppy-seeds, chunks of garlic and onions, it really does have a bit of everything, just like the name suggests. It’s great with plain butter or cream cheese alone, or piled high with meat, cheese, veggies or all of the above. It is definitely my go-to bagel but for this bagel-sandwich to be truly blog-worthy, it couldn’t be just any Everything bagel…

It had to be a Hendrickson Bagel, known more generally as an Old Strathcona Farmer’s Market Bagel!

I love the Farmer’s Market bagels! You may have to fight your way through the packed Saturday-morning crowds to get their stall, but once you do, they are so worth it! They are fresh from Sherwood Park, contain no artificial additives and no nuts! So stock up on these beauties, my fellow nut-allergy people!  Eat them with total peace of mind!

The Hendrickson version of the Everything Bagel is simply titled ‘Onion, Garlic, Sesame, Poppy’ and they have big hunks of all these great things on their golden tops. They smell so good and are soft and chewy, even when toasted. Eat them within three days of buying, or pre-slice and freeze them to extend their shelf life.  And don’t forget to grab an exciting flavor of fresh cream cheese while you’re there!

From the six bagels I bought, two had the honour of becoming beautiful sandwiches of different varieties: two open-faced, one closed.  All three are delicious bagel options I am proud to recommend to you!

2 Bagels, 3 Different Bagel-Sandwiches needs:

-2 Bagels
-Mustard
-Mayo
-Spicy pastrami
-Smoked prosciutto
-Provolone
-Strong Cheddar
-Hot Banana Peppers
-Cream cheese: spinach and feta from Hendrickson’s and the plain Philadelphia kind
-Carrots, shredded
-Red Pepper, sliced
-Red Pepper and Garlic Jelly (mine was homemade by my mother-in-law! Check out the jams and jellies at Anneliese’s Crafts at the Farmer’s Market for something similar.)
-Fresh-ground Pepper and Sea Salt

Toasted bagel, two meats and two cheeses goodness!
#1 -Toasted Pastrami, Prosciutto, Cheddar and Provolone

1-Slice a bagel and spread one half with mustard and mayo

2-Pile on the spicy pastrami, provolone, prosciutto and cheddar

3-Toast both halves in the toaster oven on medium, until cheese is melted and the other bagel half is golden brown

4-Add some hot banana peppers, combine the bagel halves, cut and enjoy!

This is a very nice combination of spicy, smokey and salty meat with the sharp provolone and strong cheddar. The peppers add some heat to a pleasantly warm and gooey blend of meat and cheese.  

#2 and #3 - Open-Faced Veggie and Meat Bagels:

Veggie:

1-Toast the bagel
2-Spread one half with a thick layer of spinach and feta cream cheese
3-Top with shredded carrot and slices of red pepper
4-Sprinkle some fresh ground pepper and sea salt on top

Meat:

1-Spread one half with plain cream cheese
2-Top with red pepper and garlic jelly
3-Fold a piece of prosciutto and place on the cream cheese and jelly spread
4-Enjoy!

The cream cheese has big pieces of spinach, which adds a different texture to this bagel.  The spinach and feta is a bold flavor combo that’s balanced out by the crisp veggies. The pepper and salt on top add a nice tang to the vegetables as well.  A thick slice of beefsteak tomato would also do nicely instead of, or in addition to, the red pepper. 
Can't go wrong with half veggie, half meat!

On the meat half, the jelly is both sweet and spicy and works well with the smoky prosciutto. The cream cheese and jelly melt well together on the toasted bagel half, so it’s a bit of a gooey, and chewy but tasty mess. 

So for your next sandwich, bypass the standard bread and go for something a bit different instead. These three bagel sandwiches show that with some creativity in mixing and combining your ingredients, you can have your bagel and eat it too!

Some extra Bagel facts to snack on:

-The bagel’s holey design suggests a desire to make this kind of food easily transportable as “it's possible to thread such a roll on a stick or a string” and take it to-go. (A Short History of The Bagel, www.slate.com)

-Bagels are boiled and then baked, a process which helps them to last longer because their exteriors become harder than other breads. (A Short History of The Bagel, www.slate.com)

-Bagels are delicious but slicing them can also cause severe injuries if you’re not careful!  Apparently, “1,979 people [went to emergency rooms] with BRI (bagel related injuries)…in 2008”!  (Newman, Barry. To Keep the Finger Out of Finger Food, Inventors Seek a Better Bagel Cutter, The Wall Street Journal, December 2009)

-If you enjoy kitchen gadgets, you may want to invest in a bagel slicer to minimize your risk of BRI. But if slicing a bagel without one really makes you feel alive, at least be smart about it and don’t hold it in your hand while you cut!  Place it on a flat surface, hold it down with one hand and carefully slice through the bagel horizontally. (http://homecooking.about.com/)


Thursday, March 13, 2014

I Heart the New York Bagel Café

It had me at the mustards.

The first thing I saw after I crossed Gateway Boulevard and stepped into the New York Bagel Café was the centre-piece of mustards, hot sauces, jams and honeys grouped together on each table and I fell for NYBC.

Great centerpieces and menu!
How could I not?! There were three kinds of mustard on my table and I hadn’t even seen the menu yet!

It was my first time venturing into the little bistro on Gateway and 84 Ave and I was excited to take myself out for lunch for a different kind of sandwich experience and finally discover its appeal. I caught it at a quiet moment in the afternoon, which is a rare thing since I've heard that comfortable space is bursting with people during a post-Farmer’s Market run on the weekend. I was grateful for the quiet, as it gave me time to take in the friendly vibe - and to study the incredible menu.

The range of choices is definitely impressive for a place that size. NYBC has an extensive breakfast menu with over 20 different Eggs Benedict combinations, plus a solid selection of meat-free bennies and fresh perogies every day. But seeing as it’s the New York Bagel Café, there was really only one option I was willing to consider.
Not the average sandwich menu...

Or so I thought… 

After reading through and visualizing/taste-alizing (like visualizing, only with taste) the remarkably long list of bagel platters, I went with a classic: Lox and Cream Cheese. On white, whole wheat, cheddar or pumpernickel? Or rye bread? While I was tempted by the different options, I chose the whole wheat bagel.  What better way to be ease into this new eatery than with a tried-and-true selection?

It’s always exciting to wait for your food the first time you visit a new restaurant and I enjoyed my wait.  The eclectic music of lively Latin beats, bohemian guitar and the gravely vocals of Leonard Cohen added to the laid-back, slightly off-beat atmosphere. There was even a stack of Far Side comic books to peruse through while I anticipated my lunch's arrival.

Lox and Cream Cheese: an NYBC classic.
New York Bagel Café gets full marks for food presentation! My chosen bagel platter was a beautiful sight to behold: an artfully arranged, colourful spread of brown bagel, rusty-coloured lox, khaki capers and crisp white cream cheese and onions - plus a sour dill pickle on the side.

Since I am that person who takes photos of their food in public, I quickly snapped a few images on my phone and started in on my bagel masterpiece.  

Taking full advantage of the DIY factor involved, I laid the cream cheese on thick, then piled on the lox, capers and yes, the onions because apparently, I like them now!, and I savored that beautiful first bite.

Don't hold the onions - they're great on this bagel!
Really lovely flavours and textured emerged as I ate up my bagel: the smoky, oily salmon, the sharp crunch of onions and the peppery capers. Alternating crunchy bites of bagel with sips from the frothy blend of espresso and chocolate and warmth that was my moca, I thoroughly appreciated the experience of NYBC. 

It’s a good food restaurant, not a fast food one, as a small sign on the bar indicates, so go when you have time to sit, relax and be intrigued by different bagel combinations, intense coffee selections and the varied collection of condiments on your table.  Don’t rush your New York Bagel Café experience; take your time to delight in its charms.

The only unfortunate part of the afternoon - I didn’t get to try all the mustards on my table. But I’m looking forward to going back so I can see which bagel platter pairs well with my beloved whole gain Dijon…

It may take more than one trip back to find it, but I’m up for the challenge!