Showing posts with label garlic. Show all posts

Saturday, April 23, 2016

Mmmozzarella Meatball Subs

Remember when Joey on Friends swore his meatball sandwich was “the greatest sandwich in the world”? He loved it so much he even dove to ‘protect it’ from what he thought was gunfire, prompting Chandler to think he cared more about Ross, who was next to the sandwich, than him. 

Turns out it was actually a car backfiring and nobody and no sandwiches were ever in any danger but whatever - to Joey, it was worth taking a bullet for.


To quote Chandler, could there be any higher compliment paid to a sandwich?

Ever since I started this sandwich blog, I’ve wanted to make a meatball sub-style sandwich and revisiting this Friends episode reminded me that our previous attempts, while commendable and tasty, just weren’t quite blog-worthy yet. I knew we were close to something great; we just needed a little something extra…

So I consulted one of my new Jamie Oliver cookbooks and found the answer – our meatballs needed to be a mixture of beef AND pork. Another burst of inspiration had us tossing in some sautéed green peppers for another layer of flavour and with a side of Crunch Veggie Salad, we’d finally done it – our Mmmmozzarella Meatball Sub was ready to meet the world.

Mmmozzeralla Meatball Subs

You will need:

Ground Pork

Ground Beef – I’d recommend getting lean ground beef since ground pork is usually higher in fat content

Bread crumbs – we used our immersion blender to crumb-ify half a dried baguette; worked great

One egg

Minced garlic or garlic powder – we didn’t measure specifically but it looked to be around ½ - 1 Tbsp

Minced rosemary – around 1 tsp-ish

Fresh baguettes or sub-style loaves, 1-2 depending on how many sandwiches you want to make

Mozzarella cheese, torn into chunks

A jar of your favorite tomato-based pasta sauce – after experimenting in our previous attempts, we recommend one with a bit of a spicy kick, like our favorite Arrabbiata sauce from Barilla

One green pepper, sliced and sautéed

Process:

1-Combine the pork and beef in a big bowl and use your (clean) hands to mix it all together.

2-Add the egg and bread crumbs and keep mixing until the meat sticks together but isn’t too wet; add more crumbs to achieve this and add the spices.

Meatball process
3-Shape the meat into balls; try to make them the same size so they cook evenly.

4-Place the meatballs into an oiled pan and bake in the oven until they’re cooked all the way through. (You will probably have to sacrifice one to check, but you can still use it in your sandwich.)


Watching and waiting for meatball goodness

4.5-Make the Crunchy Veggie Salad:

            -Chop and combine red and yellow peppers, cucumbers, tomatoes, celery and crumbled goat/feta cheese in a bowl

            -Mix olive oil, cider vinegar, balsamic vinegar and oregano and pour over salad 

(Tip: If you make a big batch and know it will all get eaten, pour it over everything. But if you plan to eat this salad with a few meals, only pour the dressing over your individual serving to avoid it turning into a soggy mess.)

Crunchy Veggie Salad

5-Cut the baguette in half, length-wise and fill with meatballs and green peppers.

6-Pour pasta sauce on the meatballs and top with chunks of mozzarella.

7-Bake or broil the sandwiches in the oven, around 3-5 minutes, until the cheese is melted and the bread is golden.

8-Serve with a side of Crunchy Veggie Salad.

Mmm!

Definitely one of the most photogenic sandwich creations we’ve made.

The pork and beef combo work so well together, I can’t believe it took us this long to figure it out. One fun variation to try is to stuff the meatballs with mozzarella before you bake them. This makes for some oozy, cheesy meatballs, if that’s your thing. I could go either way on this, but the pork and beef togetherness are a must.

Meatballs are actually quite easy to make and there are so many recipes out there to experiment with, so don’t be afraid to roll up your sleeves and get in there.

Here are some meatball recipes to get you started – have fun! 


Joey would certainly approve.

Saturday, December 6, 2014

The 9 Hour Beef Dip

It’s been over a year since I’ve started blogging about the beautiful world of sandwiches and this next creation wins the award for having the longest cooking-time – 9 hours!

This is all thanks to an amazing kitchen appliance: The Slow Cooker, or Crock-Pot, whichever name you prefer.
A must-have for any busy household!
My slow-cooker is on my Top 3 Best Kitchen Appliances List along with the coffeemaker and the Bosch Mixer. I've had one ever since I moved out on my own and needed to learn how to cook for myself. When my husband and I first moved in together, we each had a slow-cooker and sometimes, used both of them at the same time! It was hard to decide which one to take with us to France. His won out, being slightly bigger, so I sent mine home to my parents; there was no way I could give it away to a stranger after all the lovely meals it provided over the years.

Slow-cooker meals are nearly impossible to mess up and when life gets busy, as it always does, it makes cooking good, hearty meals practically effortless. What better thing is there than coming home after a busy day to a delicious smell wafting through the house and your dinner nearly ready? 

The 9 Hour Beef Dip is my first slow-cooker sandwich creation and I was thrilled with how it turned out. After roasting the beef all day, it only took ten minutes to assemble and even less time to wolf down!
Quick prep for some slow cooking!

You will need:

1 Small beef roast
1 ½ Tsp each of thyme and rosemary
3 Garlic cloves, minced
2 Cups beef broth
2 Tsp teriyaki sauce
1 Small onion, chopped
Red and green bell peppers, one of each
Edam cheese
Baguette-style loaf of bread
Small bowls or ramekins for the dipping sauce

Prep:

1-Work backwards 9 hours from when you want to eat and get your roast in early.

2-Mix all the spices together and sprinkle on your roast, covering it entirely.

3-Place roast in the slow-cooker and cover with chopped onions and beef broth.

4-Cover with the lid and cook on low for 9 hours

5-No peeking! It’ll smell amazing and you’ll be tempted to lift the lid but according to my Fix-It and Forget It Cookbook, “every time you take the lid off, the cooker loses steam…and it takes 20 minutes to regain lost steam and temperature.” Just relax and let it do its thing uninterrupted.

Gorgeous colours and softened just enough.
Sandwich Assembly:

1-About 10 minutes before you take the meat out, sauté the peppers in some olive until soft.

2-Remove the roast from the slow-cooker and carefully cut it into thin slices.

3-Slice the bread loaf and arrange beef slices, peppers and cheese inside.

4-Ladle some of the beef juice into the small bowls/ramekins for dipping.

5-Serve warm and enjoy!

Quick and easy sandwich assembly.

A note about dipping technique:


Submerge the sandwich into the dipping sauce as far as you can. The bread acts like a sponge and absorbs the tasty liquid, which softens the crust ever so slightly. The result is a tasty, hearty,savory, effortlessly made, beef dip sandwich.

Definitely worth every hour of waiting!
   
The 9 Hour Beef Dip

Monday, October 6, 2014

Fall evenings with Gouda Grilled Cheese and Spicy Carrot Soup

It’s fall everywhere and it’s a beautiful time of year!

I love finally getting to wear my favorite fall jacket: a dark green corduroy blazer, with matching green leather gloves. It’s time for sweaters, boots and scarves. Fall means mornings with a slight misty chill that turn into sunny afternoons that are still nice enough to be outside for a walk or a coffee on a patio. It’s beautiful colours and smells and it’s time for warm, gooey, spicy comfort food: grilled cheese and spicy carrot soup!


Sizzling and simmering! My Mom made the Bon Appetit needlepoint.
It's perfect for a French kitchen!

A simple soup and sandwich night has been long overdue, especially after such a crazy/busy summer of traveling, moving and living out of suitcases. But no more of that! I have my own kitchen again and all the knives, gadgets and appliances I’ve missed since they were packed up and shipped out, so the time for a lovely comfort meal is here!

I could have gone the easy route with regular grilled cheese and tomato soup and although it’s tasty, we've been there, done that. I like this spicy soup as a beautiful and unique alternative to tomato soup, since it’s still fairly simple, but that also has a touch of the new and blog-worthy. A distinct soup needs a distinct sandwich, so this particular grilled cheese uses special Gouda seasoned with cumin. This soup and sandwich meal may be comfort food, but it’s definitely not ordinary.
Gorgeous fall-colored ingredients.

To make Spicy Carrot Soup, you will need: 
1 kg of carrots, peeled and chopped
1 red bell pepper, chopped
1 knob of ginger, around the size of your thumb, peeled and chopped
3-4 cloves of garlic, either minced or chopped
2 Tbsp olive oil
4 cups of vegetable broth or the equivalent in instant vegetable stock
Fresh ground black pepper, to taste
1 tsp* red pepper paste, found with Cajun/Creole ingredients (It won’t look like much, but trust me – it’s enough! You can add more but only if you want it really, really spicy! You can substitute the paste for red pepper flakes)

Blender method is worth a try.
Prep:
1-In your soup pot, sauté the ginger, garlic and red pepper paste/flakes in the olive oil for a few minutes.
2-Add the carrots and red pepper and keep sautéing, until everything is slightly softened.
3-Add the broth.
4-Bring the soup to a boil, then simmer on low for around 20 minutes.
5-Carefully scoop out small portions to puree in a blender until the whole soup is pureed. Let simmer on low while you make the sandwiches.
6-Enjoy with a side of sandwich!

To make the Gouda Grilled Cheese, you will need:
-sliced sandwich bread, in this instance, I used a Boule, a type of French bread that’s round, like a ‘boule’
-slices of cumin-seasoned Gouda
-butter

Bread, Gouda and Butter.

Prep:
1-While the soup is simmering, heat some butter in your skillet and assemble the sandwiches.
2-Keep the heat on low and press the sandwiches into the skillet with your spatula.
3-Carefully flip each sandwich until the bread is grilled golden.
4-Remove from heat, slice and enjoy with a side of soup!

Zing! This is not a bland vegetable soup!

Its bright orange color might seem mellow and soothing but look out – the combination of ginger and red pepper paste makes this soup nice, hot and spicy! As I mentioned before, be careful with your quantities, unless of course, you like it that hot. A generous dollop of sour cream or Greek yogurt also adds a cooling sensation, without taking away from the overall taste. All spiciness aside, this is one of my favorite soups because it’s so flavorful and simple to make. Plus, it’s ridiculously healthy! This was the first time I used the blender method, as opposed to an immersion blender, and although slightly less convenient, it worked out just fine.  

As for the sandwich, I really liked the cumin in the Gouda and I’m glad I tried it for a new twist on an old classic. It adds a rustic, slightly smoky flavor to the sandwich. It was a nice, relaxed touch to a spicy and satisfying fall meal.

Gouda Grilled Cheese and Spicy Carrot Soup


For a meal that’s as healthy as it is hearty and warm, it’s hard to beat the soup and sandwich combo. Play with the flavor combinations to find one that’s comfort food without being boring. Then enjoy those chilly fall nights, listening to the wind while you’re curled up with your hot bowl of soup and gooey grilled cheese sandwich.

Bon appétit!


Sunday, June 1, 2014

Thinking Outside the Bread Box – The Versatile Tortilla

Versatility, thy name is Tortilla.

This statement may come across as overdramatic, but it’s completely true.

The Tortilla is an impressively adaptable substitute for bread for sandwich-type endeavors. This makes sense considering tortillas have been around since the time of the Aztecs. They are traditionally made from corn dough called masa, shaped by hand and seared each side on a hot griddle. Today they come in all sizes and flavors – whole wheat, three cheese, sundried tomato, spinach, etc. -  and they can be stuffed with anything, hot or cold, and shaped into whatever configuration suits your taste.

Versatile tortillas use versatile ingredients.
To prove this and to celebrate the fun and flexibility of the Tortilla, I present you with three different tortilla experiences: a Wrap, a Quesadilla and a Burrito. These three tortilla-based meals can be made with very similar ingredients, depending on what you feel like. If you can't decide which one to make, there's nothing stopping you from making all three at once. Just be creative with what you have and go for it!

The Ranch Chicken Salad Wrap needs:
-Tortillas, any flavor will do
-Romaine or Iceberg lettuce, washed and torn into small bits
-Cooked chicken breast, chopped into small pieces
How stuffed can wraps get?
-Tomatoes, diced
-Red peppers, sliced
-Parmesan cheese, grated
-Ranch Salad Dressing

Prep:

1-Toss the lettuce, chicken, tomatoes and ranch dressing.
2-Spoon the salad mixture into a line down the centers of the tortillas.
3-Sprinkle with Parmesan cheese and add slices of red pepper.
4-Fold up the bottom of the tortilla to the centre and fold the outer ends over each other, leaving one end open.
5-Carefully place the wrap on a plate, folded side down, to keep everything together.
6-Eat it carefully to avoid it coming unwrapped. Enjoy! 

All wrapped up in tortilla goodness.
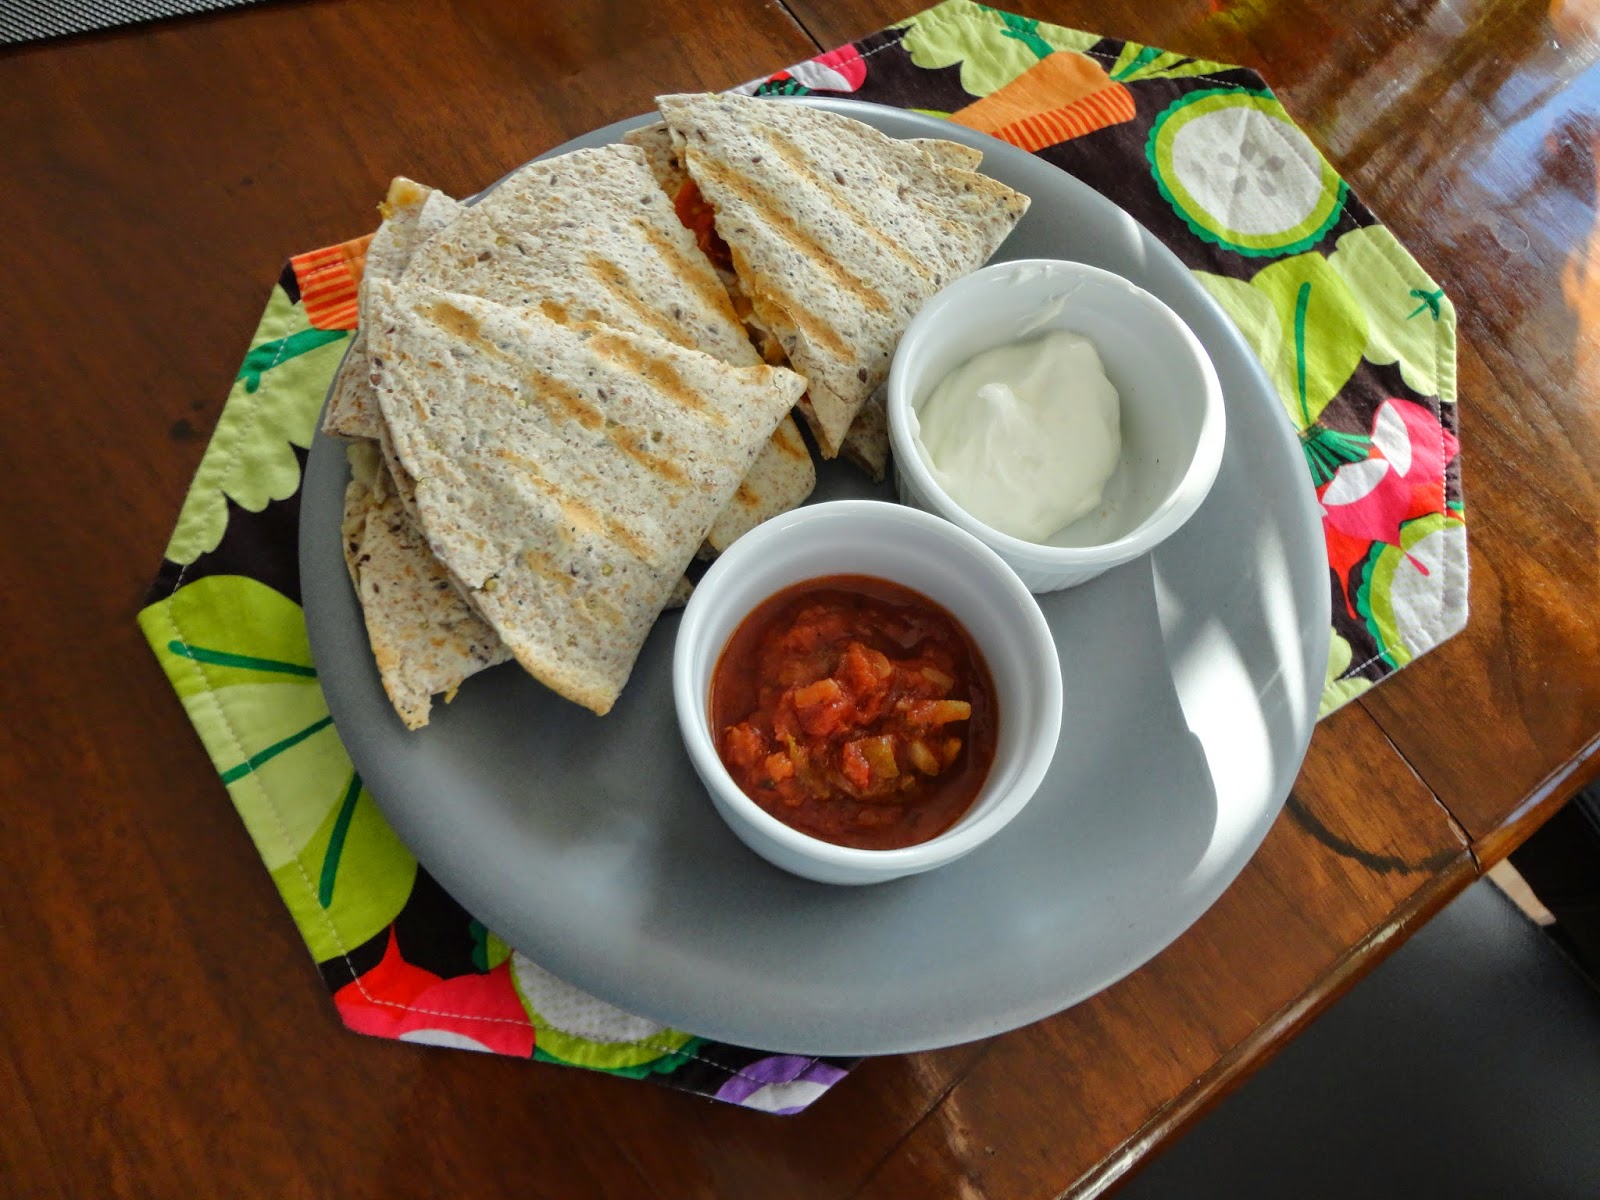
Two layers of grated cheese tops this quesadilla.
Since wraps are incredibly quick and easy to make, the hardest part will be deciding what to put in yours! Experiment with different fillings, hot or cold, and see how stuffed you can make them. There is another folding technique that completely closes the wrap off, which can be good if the one you’re making is double-stuffed and needs the extra containment. I personally prefer the open end because I can easily top it off with extra wrap stuffing.  Just like the tortillas that hold them all together, wraps are deliciously multipurpose and underrated. 


The Spicy Chicken Quesadilla needs:

-Tortillas, any flavor will do
-Cooked chicken breast, seasoned to your liking and chopped into small pieces
-Cheddar and mozzarella cheese, grated
-Red or green peppers, diced
-Tomatoes, diced
-Banana peppers or *Jalapenos (if you dare!), diced
*If you are chopping up jalapeno peppers, be very careful not to touch your face, especially your eyes, when handling jalapenos! Wash your hands and chopping station thoroughly to avoid unnecessary pain and suffering. Canned jalapenos are a safe alternative as well.*
-Sour cream
-Salsa
-Guacamole (store bought or try making it yourself!)

Prep:

1-Sprinkle a thin layer of grated cheese on half a tortilla.
2-Pile on the chicken, peppers/jalapenos and tomatoes.
3-Top with one more layer of grated cheese.
3-Fold the tortilla in half and carefully place it on a hot Panini press for 3-4 minutes.
4-Remove from heat when golden grill marks are visible and the insides are melted.
5-Slice the quesadilla into triangles and serve with sides of salsa and sour cream. 

Complete with salsa and sour cream. Guacamole is also a good side.
This Quesadilla makes a filling meal or satisfying snack. I like to season the chicken with some chili or cayenne pepper for some extra oomph. The spicy banana peppers are my favorite part; since I’m not quite ready to go all out with jalapenos, they add some heat without the complete searing of taste buds and don’t make downing ice water a requirement for enjoying this meal. 


Go as spicy as you want!

The Bean Burrito needs:

-Tortillas, any flavor will do
-1-2 cups cooked rice
-1 can of a Bean Medley (red kidney beans, chick peas, etc.)
-1 Tbsp olive oil
-1 small onion, diced
-1 Tbsp minced garlic
-1-2 tsp chili or chipotle pepper (depends how spicy you want it)
-2 tsp cumin
-Sharp cheddar cheese, grated
-Red, green or yellow peppers, diced
-spinach (optional; depends how stuffed you want it)

Stuffed to the brim with rice, beans and veggies.
Prep:

1-Cook the rice per the instructions (if using a rice cooker, make sure you add enough water and a little oil, to avoid the rice drying out/getting crunchy)
2-Add the oil into a heated skillet and sauté the garlic and onion until soft, about 5 minutes.
3-Rinse the beans and add to the oil, garlic and onion.
4-Add the spices and mix to coat the beans evenly. Cook for another 5 minutes or so.
5-Scoop the rice and beans into a line in the center of your tortillas.
6-Pile the veggies and sour cream on top.
7-Carefully fold the bottom up to the centre and fold the outer end over each other.
8-Flip and place folded side down to seal it.
9-Enjoy!

This bean burrito adds a vegetarian option that’s super filling and very healthy.  Experiment with your favorite spices and vegetable toppings to make yours truly unique. You might even want to try seasoning the rice with a splash of lime juice and some chopped fresh cilantro (excellent flavors!). If you're not into beans - you should be because they're tasty and extremely good for you - season chicken or slices of steak with the same spices.


Whether you make it into a wrap, a grilled quesadilla or burrito, your tortilla is sure to please because versatility makes any sandwich experience fun and uniquely yours.

Thursday, April 10, 2014

Classic Grilled Cheese and Tomato Soup

The world of the Grilled Cheese Sandwich is an exciting place to delve into.  On one hand, it’s filled with passionate experimentation and a fearless sense of ‘what-else-can-we-try?’ and on the other hand, there is a fierce loyalty to keeping it simple and classic. 

So again I ask you, where do I begin? 

And I find myself answering with a yet another question: why not start at the modest and humble beginning?

The Grilled Cheese Sandwich can be traced back to the 1920s, but it wasn’t until the Great Depression that it really took off in popularity. When cheap bread, processed cheese and a little heat were combined, people found they could enjoy a tasty, filling meal when good food was often very hard to come by. The military soon discovered that grilled cheese was one of the easiest and least expensive meals to mass-produce and when it was served along with tomato soup, it allowed them to get in the recommended Vitamin C in-take.  And that’s how it all began.
Simple and delightful grilled cheese and tomato soup.

It’s pretty amazing how a simple meal meant to provide the bare minimum in taste and nutritional value has really stood the test of time. To kick off National Grilled Cheese Month, I will pay homage to this great sandwich in its most simple, definitive form – grilled straight up on a skillet and served fresh with a side of hot, homemade tomato soup. 

I’ve spent a lot of time researching tomato soup recipes and there are as many different versions as the various kinds of grilled cheese, which makes perfect sense.  I made a tweaked version of a Jamie Oliver recipe and it paired beautifully with the sandwich.  Since timing is important when you’re preparing more than one dish, I recommend getting the soup started first, then making the sandwich. 

Tomatoes, carrots, onions and celery make a great soup.
Classic Tomato Soup:

1-2 onions, coarsely chopped
1 handful of chopped baby carrots (no peeling required!)
2-3 stalks of celery, chopped
1 carton of vegetable stock (chicken stock works well too)
1 19 oz can of stewed tomatoes
1 container of grape tomatoes, chopped
1 tbsp minced garlic
2 tbsp olive oil
Fresh basil leaves
Salt and pepper

Preparation:

1-In a large soup pot on medium heat, combine the oil, garlic, onion, carrots and celery and sauté for 10-15 minutes, until the veggies have softened.
2-Add the stock and all the tomatoes.
3-Bring the soup to a boil, then reduce the heat, cover and simmer for 10-15 minutes.
4-Add some fresh basil during the last few minutes of simmering.
5-Using an immersion blender, puree the soup to your desired texture (smooth vs. chunky).
6-Simmer on low until ready to serve topped with fresh basil leaves and the grilled cheese sandwich.
Dijon mustard really enhances this sandwich.

While the soup is simmering during Step 3, start making the Classic Grilled Cheese Sandwich using:

Sliced sourdough bread
Slices of cheddar and mozzarella cheese
Dijon mustard (optional but I highly recommend it!)
Butter

Preparation:

1-Pile the cheese on one half of the bread.
2-Spread a thin layer of mustard on top of the cheese.
3-Spread the butter on the outsides of the bread and carefully place the sandwich on the pre-heated skillet.
4-Cover with a lid and let it grill.
5-Be patient! The trick to stove-top grilling is low and slow to ensure the cheese melts inside and the bread doesn’t burn outside.
6-When you start to hear the bread and cheese sizzle (about 3-4 minutes), it’s time to carefully flip it over. The grilled side should be a nice golden colour.
This sandwich needs low heat and lots of grilling time.
7-Press down on the sandwich with a spatula to ensure maximum cohesion of the cheese and bread.
8-Keep flipping and grilling the sandwich until the cheese is melted and the bread is golden brown.
9-Remove from heat, slice and serve with the tomato soup.

There’s a reason why this soup/sandwich combination is so timeless: it’s warm, savory, and so delectable!

I’ve sometimes found tomato soup to be bland and one-dimensional but this recipe really delivers on the flavor. I like the slightly chunky texture of the pureed vegetables and its gorgeous orange colour.  Using fresh herbs in any recipe really adds an extra-special element and the fresh basil (literally) tops this one; it makes it so crisp and sweet. Really lovely. 


Golden delicious: grilled cheddar and mozza cheese.
As for the sandwich, the Dijon mustard was a great addition to the gooey, delicious, melty inside. It gave it a bit of sweetness and tang, plus it’s basically impossible to go wrong with cheddar and mozza. Sourdough bread grills so well and I love that audible crunch when I bite into it.  Definitely don’t scrimp on the butter since it adds that special sheen and eliminates stickage during the grilling process.


This meal sticks to the basics - good bread, good cheese and hot soup - and it’s a great way to dive into the Grilled Cheese realm. There will be lots of experimentation this month, I guarantee it.  

But right here and now, somethings are just too good to mess with.

If it's not broke, don't fix it!

Grilled Cheese Links: