Showing posts with label cheddar. Show all posts

Sunday, December 27, 2015

Homemade Tim Hortons Breakfast Sandwich

Being the good Canadians we are, my husband Mike and I suffer from the occasional bout of Tim Hortons withdrawal.

For those readers who are unfamiliar with the institution that is Tim Hortons, allow me to educate you: Tim Hortons is the largest fast-food chain in Canada and it specializes in doughnuts, coffee and sandwiches. It was founded by Canadian NHL hockey player Tim Horton in the 1960s and there is a Tim Hortons in virtually every Canadian city, post-secondary campus, airport, community sports complex and corner gas station.  It’s known as Tims, Timmie’s, or Timmy Ho’s, in various communities. Their ‘Rrrroll up the Rrrrim to Win!’, ‘Camp Day’, Double-Doubles, Timbits doughnuts and the Timbits hockey teams (both of my nephews have started their hockey careers as Timbits, as well as NHL superstar Sidney Crosby), and their many other marketing tie-ins are extremely popular throughout my home and native land.

My Grandpa goes to the Tim Hortons in Olds, AB almost every day to visit with whoever’s there. My father-in-law makes daily runs into the Stettler, AB Tims for his large, black coffee. When we visit them, he often brings me back a small pack of Timbits, which I have to hide from the dogs. The chocolate ones are my favorite. Friends of mine swear the ultimate hangover cure is a large order of Tim Hortons chicken noodle soup and Mike has a soft spot for their iced-cappuccinos, no matter the outdoor temperature. I’ve often picked up coffee and snacks for my friends and coworkers as fuel during report card time, and almost every staff meeting or potluck lunch includes a box of Tim Hortons doughnuts.

So you can see how we would miss it occasionally.

In the winter, Mike and I would often pick up two sausage breakfast sandwiches, hashbrowns and orange juices on our way out to the cross country ski trails. Admittedly, not the most healthy pre-skiing breakfast, but it always hit the spot and gave us motivation to ski harder to burn it off.

The snow is scarce here in Le Plessis-Robinson, France and so are the fast-food places, which is actually a really good thing. But not when you’re missing a taste of home.

So we created our own, Homemade Tim Hortons Breakfast Sandwich and now you can too.


Ingredients:

-Half a pack of ground pork
-1/2 teaspoon each of paprika and cayenne pepper
-Cheddar cheese slices
-Eggs (1 per sandwich)
-Homemade dinner biscuits, which I made using butter instead of shortening, from this good recipe

Prep:

1-Mix the paprika and cayenne pepper in with ground pork.

2-Shape the pork into small patties and grill on a hot skillet. 

3-Make the biscuit dough and cook them for 13-15 minutes, as per the recipe. For a convection oven, set the initial time for 10 minutes and check them periodically to avoid burning. Allow them to cool a few minutes before assembling the sandwiches.

4-Whisk the eggs individually and pour each egg into a small, greased, microwave safe dish. 

5-Microwave the egg on a low setting, and check/pause it regularly to prevent mess and overcooking. Or cook them in the pork grease, if that’s what you fancy.

6-Slice the cooled biscuits in half and assemble the sandwich. Our order was egg, cheese, meat, top.

7-Pour yourself a Double-Double or a glass of orange juice and enjoy.

The result for us was a welcome taste of Canada on a balmy, French winter day. 

I’ll leave you to your sandwich making now, along with one of my favorite Tim Hortons commercials, featuring Sid the Kid himself and a nation of hockey-crazed Canadian folks.


Enjoy!


Tuesday, June 16, 2015

Baked Potato Grilled Cheese

In my constant search for sandwich-inspiration, thank goodness for the Internet!

I recently found an epic list of different grilled cheese incarnations, henceforth to be referred to as The List, and after I wiped the drool off my chin, I faced the difficult decision of which one to make. The Baked Potato Grilled Cheese won out and I’m super excited to share my vision of it with you.


To create this sandwich edition of a baked potato with all the fixin’s, you will need:

-2 Large Baking Potatoes (Russets are good)
-Bacon
-Sharp cheddar cheese
-Sturdy sandwich bread
-Green onion
-Sour cream or crème fraîche


Prep :
1-Fry the bacon until crispy, then cut it into small bits.
2-Shred the potatoes and fry them up like hash browns (in the bacon grease, if that’s how you roll).
3-Slice the onion and grate the cheese.
4-Assemble the sandwich and insert some toothpicks to hold everything together.


Cooking:
I tried to grill them in the skillet like a regular grilled cheese, but the abundance of ingredients made it difficult for the sandwich to melt together and flipping it was basically impossible. So I did what one does when making stuffed baked potatoes: I baked them in the oven! They only needed 15 minutes total, but I rotated the pan at halftime so make sure they cooked evenly.

I served them immediately with a side of sour cream. So good! The onions were the unexpected star of this sandwich, as they added a nice spicy flavour and heat, while complimenting the bacon and the potatoes. This is a super-filling sandwich on its own, but I recommend adding a side salad to balance out the hot-mess of melted cheese and bacon grease.


It doesn’t have to be Grilled Cheese Month to enjoy this type of sandwich. If you’re feeling adventurous and creative, consult The List - and the blog! - for some excellent sandwich-spiration. 


Happy Grilling and Sandwich Eating!

Friday, July 11, 2014

Made In Canada

Happy Summer Sandwich-Lovers, and I hope your Canada Day 2014 was wonderful!

Canada Day has always marked the beginning of summer with some sort of party or BBQ. When I was growing up, my family of teachers would almost always head down to my grandparents’ house in Olds to celebrate the end of the school year and my cousin’s birthday. Now as a teacher myself, I appreciate the gloriousness of July 1 even more and the party/BBQ tradition has continued – I have even hosted! Canada Day is always a great day to get together with friends and family, wear the red and white and eat/drink all in the name of summer and patriotism.

Since my husband and I are moving to France next month, there is a good chance this July 1 marked the last Canada Day we’ll spend in Canada for a while. This upcoming move is definitely an exciting opportunity for us both and the support from our family and friends continues to be amazing.  We are definitely looking forward to the adventure but still, it’s a bit bittersweet.

I am, and always will be, a proud Canadian and moving away from the True North Strong and Free won’t change that. We will find new ways to celebrate - there’s a rumor that the Eiffel Tower is lit up red and white on July 1 – and we’ll make new traditions. But I am certain there’s one thing that will never change, regardless of where we are and that’s the tradition of eating great food with great people.

To mark this special Canada Day, I made a delicious sandwich of all-Canadian ingredients and my favorite Oh Canada Cookies.  Enjoy!

All-Canadian Ingredients for this sandwich!
The Made In Canada Sandwich needs:

Dempster’s Whole Grain Canadian Bread
Maple Leaf Natural Selections Turkey and Ham
Maple Leaf Bacon
Sobey’s Sensations Canadian Cheddar
French’s Mustard (not actually a Canadian brand but it works to honour French as one of our official languages)
Mayo
Lettuce and Radishes (from our own garden!)  


Prep:
1-Cook the bacon according to your preference for crispy/soft. Drain on paper towels and set aside. (Remember, don’t pour the grease down the sink!)
2-Toast the bread.
3-Spread the mustard on one piece of bread, the mayo on the other.
4-Layer on the turkey, ham, cheddar and bacon.
5-Top with radish slices and lettuce.
6-Slice and serve with some Oh Canada Cookies and your favorite cold beverage.

The recipe for the Oh Canada Cookies is a basic sugar cookie recipe from an old issue of Inspired, the free magazine Sobey’s used to put out a few times a year. I like this recipe because it’s really simple and easy to adapt to make other kinds of sugar-cookie type cookies.

All these Maple Leaves need is their red!
You will need:
2 butter sticks, or 1 cup of butter, softened (I leave the butter out for several hours to get really soft)
1 cup white sugar
1 Tbsp vanilla
1 egg (the original recipe says it should be warmed to room temperature, but I don’t think it makes a huge difference either way)
2 ½ cups of flour
Electric or stand mixer

Cookie Prep:
1-Combine the butter, sugar and vanilla and mix until smooth.
2-Add the egg and continue mixing*.

*It’s very important to add the egg BEFORE you mix in the flour. I learned this the hard way and ended up with very flaky and crumbly dough. It ended up being alright eventually, but it meant I had to spend more time kneading the dough so it wouldn’t crumble when I tried to roll it out.

3-Add the flour and mix until a dough forms.
4-Knead the dough in the bowl with flour-covered hands until smooth.
5-Place dough ball in a covered bowl and chill for at least 20 minutes.
6-Roll dough out to desired thickness. (Some people like to cover the dough in parchment paper to do this. It’s up to you.)
7-Use a Maple Leaf cookie cutter to cut out the beautiful cookies. Leave some space between each cookie on your baking sheet  
8-Bake at 350F in the middle of the oven for 10-12 minutes.
9-Transfer cookies to a rack to cool completely before decorating.

Oh Canada Cookies with red maple butter cream icing.
While the cookies bake, make the Red Maple Butter Cream Icing:

1-Mix ½ cup softened butter with 2 cups icing sugar.
2-Add ½ tsp maple syrup (more if you like!) and 2 Tbsp milk or water.
3-Mix until desired smoothness; add more icing sugar or liquid if required and 3-4 drops of red food colouring.

To 'set' the icing, I recommend chilling the cookies in the fridge for 15-20 minutes.


The sandwiches and cookies were devoured while we watched the newest music video from Canada’s favorite astronaut, Col. Chris Hadfield and his brother Dave. If you haven't seen it yet, you're in for a treat! 


Then, we went to Telus Field to watch the Edmonton Prospects baseball game with some friends. Our seats also gave us prime view of the fireworks and the much anticipated light-up of the Highlevel Bridge.  What a show!

It was a spectacular summer night celebrating this amazing country that I will always call my home no matter where I am.  Next summer, we will celebrate Canada Day in Europe. We’ll wear our red and white, we’ll play some Rush or Tragically Hip, and we’ll be with friends - Canadian and European.  I hope they will enjoy this small taste of Canada.

I hope you enjoy it too. Je t’aime, Canada! Cheers!

Made in Canada Sandwich and Oh Canada Cookies.


Sunday, June 1, 2014

Thinking Outside the Bread Box – The Versatile Tortilla

Versatility, thy name is Tortilla.

This statement may come across as overdramatic, but it’s completely true.

The Tortilla is an impressively adaptable substitute for bread for sandwich-type endeavors. This makes sense considering tortillas have been around since the time of the Aztecs. They are traditionally made from corn dough called masa, shaped by hand and seared each side on a hot griddle. Today they come in all sizes and flavors – whole wheat, three cheese, sundried tomato, spinach, etc. -  and they can be stuffed with anything, hot or cold, and shaped into whatever configuration suits your taste.

Versatile tortillas use versatile ingredients.
To prove this and to celebrate the fun and flexibility of the Tortilla, I present you with three different tortilla experiences: a Wrap, a Quesadilla and a Burrito. These three tortilla-based meals can be made with very similar ingredients, depending on what you feel like. If you can't decide which one to make, there's nothing stopping you from making all three at once. Just be creative with what you have and go for it!

The Ranch Chicken Salad Wrap needs:
-Tortillas, any flavor will do
-Romaine or Iceberg lettuce, washed and torn into small bits
-Cooked chicken breast, chopped into small pieces
How stuffed can wraps get?
-Tomatoes, diced
-Red peppers, sliced
-Parmesan cheese, grated
-Ranch Salad Dressing

Prep:

1-Toss the lettuce, chicken, tomatoes and ranch dressing.
2-Spoon the salad mixture into a line down the centers of the tortillas.
3-Sprinkle with Parmesan cheese and add slices of red pepper.
4-Fold up the bottom of the tortilla to the centre and fold the outer ends over each other, leaving one end open.
5-Carefully place the wrap on a plate, folded side down, to keep everything together.
6-Eat it carefully to avoid it coming unwrapped. Enjoy! 

All wrapped up in tortilla goodness.
Two layers of grated cheese tops this quesadilla.
Since wraps are incredibly quick and easy to make, the hardest part will be deciding what to put in yours! Experiment with different fillings, hot or cold, and see how stuffed you can make them. There is another folding technique that completely closes the wrap off, which can be good if the one you’re making is double-stuffed and needs the extra containment. I personally prefer the open end because I can easily top it off with extra wrap stuffing.  Just like the tortillas that hold them all together, wraps are deliciously multipurpose and underrated. 


The Spicy Chicken Quesadilla needs:

-Tortillas, any flavor will do
-Cooked chicken breast, seasoned to your liking and chopped into small pieces
-Cheddar and mozzarella cheese, grated
-Red or green peppers, diced
-Tomatoes, diced
-Banana peppers or *Jalapenos (if you dare!), diced
*If you are chopping up jalapeno peppers, be very careful not to touch your face, especially your eyes, when handling jalapenos! Wash your hands and chopping station thoroughly to avoid unnecessary pain and suffering. Canned jalapenos are a safe alternative as well.*
-Sour cream
-Salsa
-Guacamole (store bought or try making it yourself!)

Prep:

1-Sprinkle a thin layer of grated cheese on half a tortilla.
2-Pile on the chicken, peppers/jalapenos and tomatoes.
3-Top with one more layer of grated cheese.
3-Fold the tortilla in half and carefully place it on a hot Panini press for 3-4 minutes.
4-Remove from heat when golden grill marks are visible and the insides are melted.
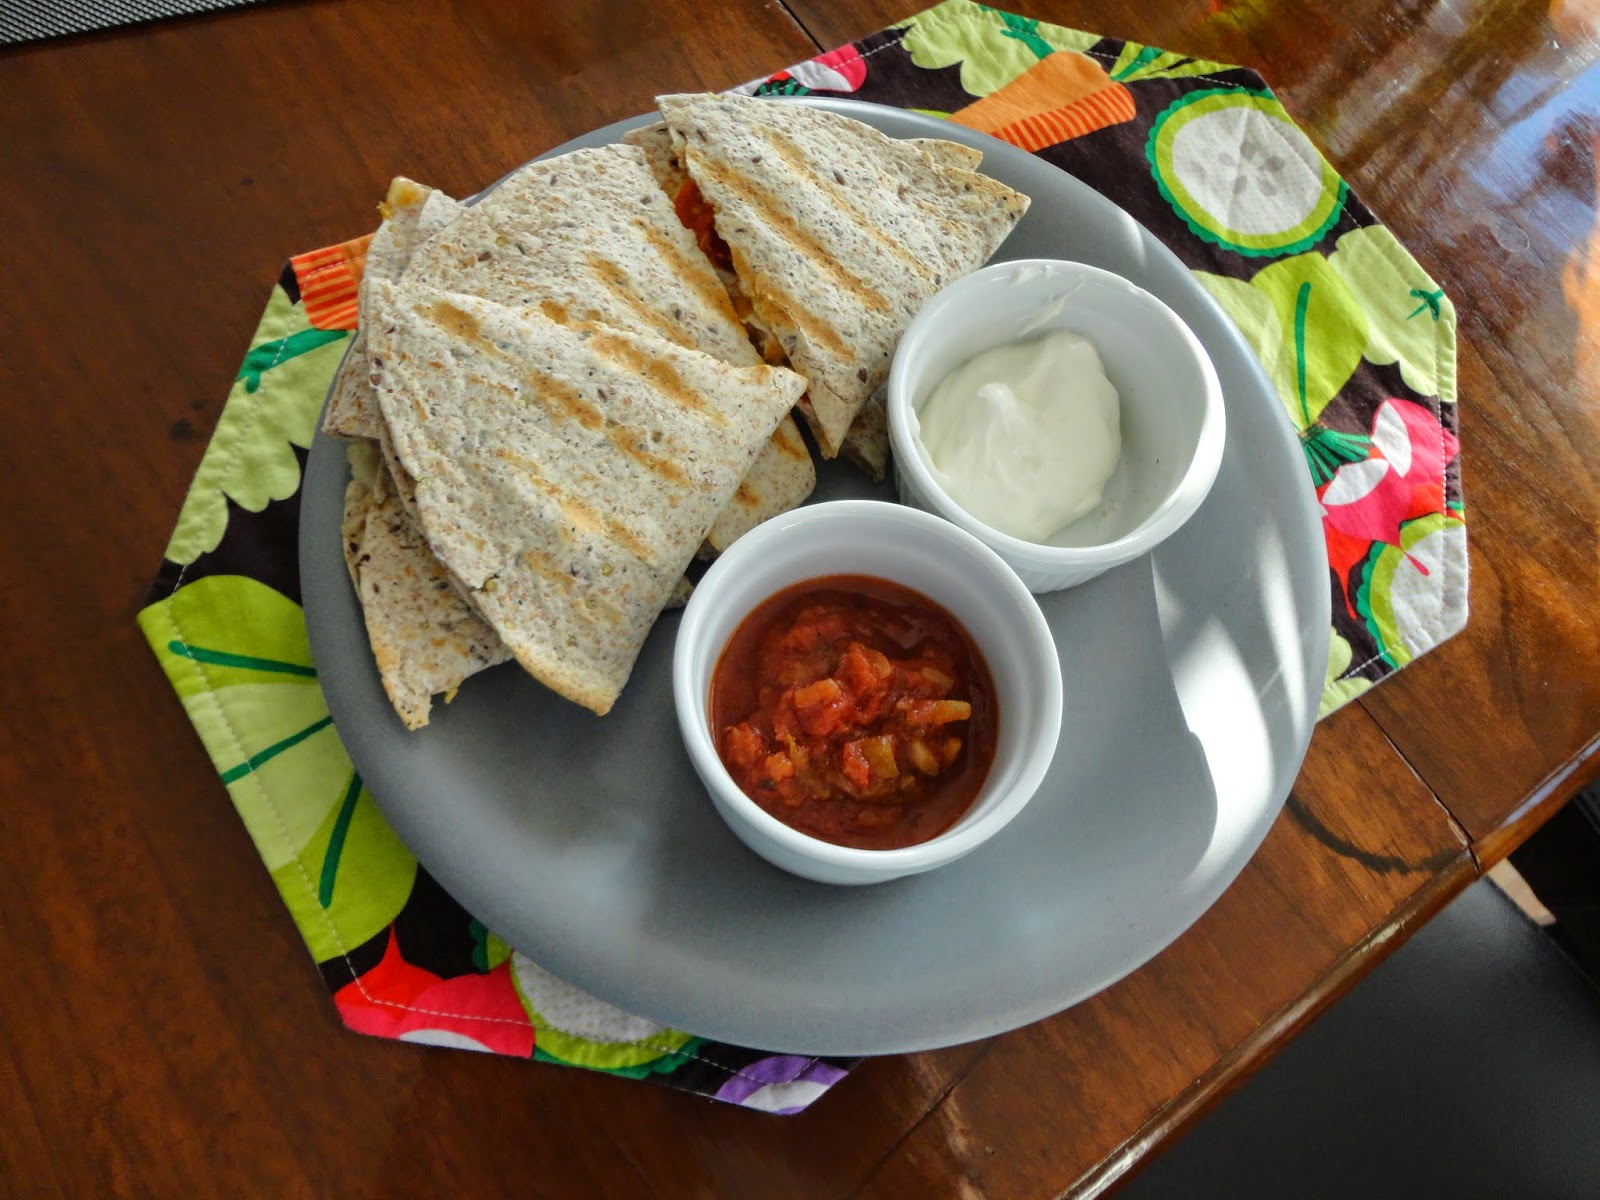
5-Slice the quesadilla into triangles and serve with sides of salsa and sour cream. 

Complete with salsa and sour cream. Guacamole is also a good side.
This Quesadilla makes a filling meal or satisfying snack. I like to season the chicken with some chili or cayenne pepper for some extra oomph. The spicy banana peppers are my favorite part; since I’m not quite ready to go all out with jalapenos, they add some heat without the complete searing of taste buds and don’t make downing ice water a requirement for enjoying this meal. 


Go as spicy as you want!

The Bean Burrito needs:

-Tortillas, any flavor will do
-1-2 cups cooked rice
-1 can of a Bean Medley (red kidney beans, chick peas, etc.)
-1 Tbsp olive oil
-1 small onion, diced
-1 Tbsp minced garlic
-1-2 tsp chili or chipotle pepper (depends how spicy you want it)
-2 tsp cumin
-Sharp cheddar cheese, grated
-Red, green or yellow peppers, diced
-spinach (optional; depends how stuffed you want it)

Stuffed to the brim with rice, beans and veggies.
Prep:

1-Cook the rice per the instructions (if using a rice cooker, make sure you add enough water and a little oil, to avoid the rice drying out/getting crunchy)
2-Add the oil into a heated skillet and sauté the garlic and onion until soft, about 5 minutes.
3-Rinse the beans and add to the oil, garlic and onion.
4-Add the spices and mix to coat the beans evenly. Cook for another 5 minutes or so.
5-Scoop the rice and beans into a line in the center of your tortillas.
6-Pile the veggies and sour cream on top.
7-Carefully fold the bottom up to the centre and fold the outer end over each other.
8-Flip and place folded side down to seal it.
9-Enjoy!

This bean burrito adds a vegetarian option that’s super filling and very healthy.  Experiment with your favorite spices and vegetable toppings to make yours truly unique. You might even want to try seasoning the rice with a splash of lime juice and some chopped fresh cilantro (excellent flavors!). If you're not into beans - you should be because they're tasty and extremely good for you - season chicken or slices of steak with the same spices.


Whether you make it into a wrap, a grilled quesadilla or burrito, your tortilla is sure to please because versatility makes any sandwich experience fun and uniquely yours.

Wednesday, May 14, 2014

Crunchy Apple Chicken Salad

I admit freely that I am loud apple-eater.

I like to think of it as really showing my appreciation for this beautiful and tasty fruit.  I take big bites and I relish every crunch.  

These Pink Ladies are the perfect blend of sweet and tarty.
What’s not to love about apples? They’re colourful, compact, extremely portable and completely edible, especially for those weird people who actually eat the cores. Plus they even sound delicious; one of the most satisfying sounds is the loud crunch of biting into a cold, crisp, sweet apple.

CRUNCH...yum...repeat

I snack on an apple almost every day and it’s nice to know I can at least cross off one serving of fruit from the list. I’m a fan of nearly every kind, though I find some kinds like MacIntosh and Spartan taste the best in the fall - much fresher and crunchier.  Lately, I prefer ones with a bit more tart; snacking on one feels more like a treat. Granny Smith apples are often the go-to apple to cut into super thin slices and include in sandwiches for this very reason. Their tartness pairs nicely with sharp cheeses and mellow meats, such as turkey or chicken. I had some leftover chicken breasts and plenty of apples, so I went about making a kind of sandwich I’ve enjoyed but never made myself: chicken salad.

As with any kind of salad-sandwich, there are so many different options! The more I read, the more I felt inspired to pull from whatever I had available for a basic dressing and go from there. This Crunchy Apple Chicken Salad sandwich uses a simple mayo/mustard dressing and my current favorite apple, the Pink Lady, which was more than up to the task of bringing the sweetness and crunch to this sandwich.
Chicken, apples and lettuce ready for tossing.

You will need:

Sandwich bread, like Rye or a coarse Multi-Grain
1-2 Pink Lady Apples, washed, cored and diced
2 cooked chicken breasts, cubed
1-2 handfuls of lettuce (I used a combination of romaine and mixed greens)
1 ½ Tbs mayo
1 ½ grainy Dijon mustard (or more if you want it spicier)
¼ tsp milk
1 handful of grated sharp cheddar
Fresh ground pepper

Toss with the dressing and sprinkle with cheddar.
Prep:

1-Combine the lettuce, diced apples and chicken together.
2-In a small bowl, mix the mayo and mustard together.
3-Thin the mixture with a drop of milk and mix to taste.
4-Toss the dressing with the salad until coated.
6-Top with fresh ground pepper and grated cheddar and toss again.
5-Carefully spoon out portions of the salad onto the sandwich bread.
6-Slice and serve.

This sandwich is a light change from the delicious richness of last month’s grilled cheeses and one of the quickest sandwiches I’ve made so far - under ten minutes to prep. The Mayo/Dijon dressing adds a pop of spiciness and let's face it, I would use Dijon on almost every sandwich I make, I love it so.  For even more flavor in the future, I suggest marinating the chicken in a mustard sauce before grilling. I also recommend tossing in some dried cranberries or raisins for another sweet flavor that would pair nicely with the apples. Really, think ‘salad additions’ and you’ll be set to toss this chicken salad up just the way YOU like it.

For a simple sandwich that’s crisp and sweet, like a leafy spring day itself, it’s hard to go wrong with a simple dressing, some leafy greens, some chicken chunks and apples.

This sandwich sounds tasty too.
The crunchier, the louder, the better. 


Thursday, May 1, 2014

A Stack of Waffle Grilled Cheese

University: a place of discovery and learning.

It was during my first year that I discovered I hated living in res and I learned how to live away from home.

Other poignant discoveries were that I liked coffee (thank you and miss you, Java Jive!), that the U of A campus in fall is one of the most beautiful places in Edmonton, that the stairwells of the Fine Arts Building are a great place to meet people and rehearse directing projects, and that walking into the Engineering building with your Complete Works of Shakespeare will get you a lot of funny looks.

And I learned to love that campus and my time there like no other time and place.
This sandwich is one of my proudest student achievements.

Being a university student also forced me to learn how to cook for myself. It wasn’t ever fancy or all that pretty but I learned because I had to and because there was only so much Subway or Edo that I could stomach. By the time I earned both my degrees, I had also graduated from Kraft Dinner and had moved on to other meals. But the one student meal I love to bring back from time to time is the Waffle Grilled Cheese

I wish I could say this sandwich was born from a great stroke of culinary inspiration but it was the stack of dirty dishes marinating in the sink that forced me to find another way to make a midnight study snack. It was out of desperation, and I’d like to think a subconscious sense of courtesy towards the upstairs neighbors that I wasn’t about to tackle the dishes at that hour, that I turned to the waffle iron I got for Christmas.

That silent, reliable, quick-heating waffle iron then became one of the best gifts I had ever received. In the student days - and in some of the first-year-teacher days - I used it more for grilled cheese than for waffles. It always saved on dishes and time and it got the job done with only a little mess. Plus, the waffle ridges are perfect for holding lots and lots of ketchup, salsa or hot sauce.

About to become golden and waffle grilled.
Like any good student meal, the required ingredients are minimal (Got bread? Got cheese? Got power? Go!), but for this post-grad version, I added some bonus ingredients to tackle that other great student meal – breakfast for dinner!

You will need:

-A sturdy waffle iron
-Sandwich bread, any kind
-Mozzarella cheese
-Cheddar Cheese
-Eggs, fried sunny-side up with the yokes medium done
-Sausage patties
-Ketchup or your choice or condiment
The sizzling means it's working.

The Process:

1-Plug in the waffle iron and let it heat up.
2-While it’s heating, fry the sausage patties and the eggs.
3-Slice the cheese and arrange on the bread slices.
4-Once the eggs and sausages are cooked, layer them on top of the cheese on one slice of bread.
5-Top of the sandwiches with more cheese and the other bread slices.
6-Carefully place the sandwiches in the waffle iron and close it up as best you can.
7-As the sandwiches grill, press the waffle iron down gently to compress them more compactly.
8-Let grill until the waffle ridges are golden and the insides are melted.
9-Remove from heat, slice and serve with your favorite topping.

Definitely one of the quickest and easiest grilled cheeses I’ve made, but the real fun is in the presentation. Stacked up on each other, they resemble an ordinary pile of glistening waffles, fresh from the grill, just waiting to be drowned in butter and syrup. But these are special waffles stuffed with spicy sausages and smothered in gooey, melted cheese. Try adding your favorite spices to the eggs for a little something extra and swap out the syrup for a hearty drizzling of ketchup. Eat it with a knife and fork or get greasy with your hands, in true grilled cheese style.

I traded-in the student-poverty and exam angst when I finished degree #2 in 2009 and finally moved above ground. To quote the teacher that I've now become, "the learning never ends" and although I’ve moved on in so many ways, that waffle iron has always come with me. Even now when I own a small sandwich grill, it’s still fun to haul it out for some Waffle Grilled Cheese so I can appreciate where I was and how much I still discover and learn each day.

Thursday, April 10, 2014

Classic Grilled Cheese and Tomato Soup

The world of the Grilled Cheese Sandwich is an exciting place to delve into.  On one hand, it’s filled with passionate experimentation and a fearless sense of ‘what-else-can-we-try?’ and on the other hand, there is a fierce loyalty to keeping it simple and classic. 

So again I ask you, where do I begin? 

And I find myself answering with a yet another question: why not start at the modest and humble beginning?

The Grilled Cheese Sandwich can be traced back to the 1920s, but it wasn’t until the Great Depression that it really took off in popularity. When cheap bread, processed cheese and a little heat were combined, people found they could enjoy a tasty, filling meal when good food was often very hard to come by. The military soon discovered that grilled cheese was one of the easiest and least expensive meals to mass-produce and when it was served along with tomato soup, it allowed them to get in the recommended Vitamin C in-take.  And that’s how it all began.
Simple and delightful grilled cheese and tomato soup.

It’s pretty amazing how a simple meal meant to provide the bare minimum in taste and nutritional value has really stood the test of time. To kick off National Grilled Cheese Month, I will pay homage to this great sandwich in its most simple, definitive form – grilled straight up on a skillet and served fresh with a side of hot, homemade tomato soup. 

I’ve spent a lot of time researching tomato soup recipes and there are as many different versions as the various kinds of grilled cheese, which makes perfect sense.  I made a tweaked version of a Jamie Oliver recipe and it paired beautifully with the sandwich.  Since timing is important when you’re preparing more than one dish, I recommend getting the soup started first, then making the sandwich. 

Tomatoes, carrots, onions and celery make a great soup.
Classic Tomato Soup:

1-2 onions, coarsely chopped
1 handful of chopped baby carrots (no peeling required!)
2-3 stalks of celery, chopped
1 carton of vegetable stock (chicken stock works well too)
1 19 oz can of stewed tomatoes
1 container of grape tomatoes, chopped
1 tbsp minced garlic
2 tbsp olive oil
Fresh basil leaves
Salt and pepper

Preparation:

1-In a large soup pot on medium heat, combine the oil, garlic, onion, carrots and celery and sauté for 10-15 minutes, until the veggies have softened.
2-Add the stock and all the tomatoes.
3-Bring the soup to a boil, then reduce the heat, cover and simmer for 10-15 minutes.
4-Add some fresh basil during the last few minutes of simmering.
5-Using an immersion blender, puree the soup to your desired texture (smooth vs. chunky).
6-Simmer on low until ready to serve topped with fresh basil leaves and the grilled cheese sandwich.
Dijon mustard really enhances this sandwich.

While the soup is simmering during Step 3, start making the Classic Grilled Cheese Sandwich using:

Sliced sourdough bread
Slices of cheddar and mozzarella cheese
Dijon mustard (optional but I highly recommend it!)
Butter

Preparation:

1-Pile the cheese on one half of the bread.
2-Spread a thin layer of mustard on top of the cheese.
3-Spread the butter on the outsides of the bread and carefully place the sandwich on the pre-heated skillet.
4-Cover with a lid and let it grill.
5-Be patient! The trick to stove-top grilling is low and slow to ensure the cheese melts inside and the bread doesn’t burn outside.
6-When you start to hear the bread and cheese sizzle (about 3-4 minutes), it’s time to carefully flip it over. The grilled side should be a nice golden colour.
This sandwich needs low heat and lots of grilling time.
7-Press down on the sandwich with a spatula to ensure maximum cohesion of the cheese and bread.
8-Keep flipping and grilling the sandwich until the cheese is melted and the bread is golden brown.
9-Remove from heat, slice and serve with the tomato soup.

There’s a reason why this soup/sandwich combination is so timeless: it’s warm, savory, and so delectable!

I’ve sometimes found tomato soup to be bland and one-dimensional but this recipe really delivers on the flavor. I like the slightly chunky texture of the pureed vegetables and its gorgeous orange colour.  Using fresh herbs in any recipe really adds an extra-special element and the fresh basil (literally) tops this one; it makes it so crisp and sweet. Really lovely. 


Golden delicious: grilled cheddar and mozza cheese.
As for the sandwich, the Dijon mustard was a great addition to the gooey, delicious, melty inside. It gave it a bit of sweetness and tang, plus it’s basically impossible to go wrong with cheddar and mozza. Sourdough bread grills so well and I love that audible crunch when I bite into it.  Definitely don’t scrimp on the butter since it adds that special sheen and eliminates stickage during the grilling process.


This meal sticks to the basics - good bread, good cheese and hot soup - and it’s a great way to dive into the Grilled Cheese realm. There will be lots of experimentation this month, I guarantee it.  

But right here and now, somethings are just too good to mess with.

If it's not broke, don't fix it!

Grilled Cheese Links: