Showing posts with label stuffed. Show all posts

Friday, November 6, 2015

Leftover Turkey Dinner Sandwiches

Gobble, gobble! 'Tis the season to celebrate big dinners and lots of leftovers!

It’s the time of year when turkey dinners make themselves at home in our kitchens, dining rooms and after all is said and eaten, in our fridges in leftover form. You could enjoy piling up plate after plate of leftovers for the next few lunches and dinners – and there’s nothing wrong with doing just that. Who doesn’t love another meal of mashed potatoes, turkey, stuffing and cranberry sauce?

Or you could compress all that goodness between two thick slices of bread instead.
And from the Tupperware and Pyrex containers of leftovers rises the Leftover Turkey Dinner Sandwich.

I’m not going to pretend the idea for this sandwich creation is uniquely mine because I know for a fact that many people have been enjoying this sandwich for countless post-turkey dinners. It’s probably not as iconic as Grilled Cheese, but it’s up there. At least, it is for me.

It’s hard to describe the sheer pleasure I got a few weeks ago, from pulling out the leftovers from our big Canadian Ex-Pat Thanksgiving Dinner and heaping them together in a huge, delicious mouthful of a sandwich. So tasty, so filling. After your next turkey dinner, I encourage you to do the same.

This was only part of the feast. Potluck dinners are amazing.
You will need:

Sandwich bread, thickly sliced, or a small baguette, ciabatta or sub-style loaf cut lengthwise
Whatever leftovers you have from Turkey Dinner: turkey, stuffing, cranberry sauce, potatoes, etc.
Mustard and/or mayo, if you so choose
A hearty appetite
Stretchy pants or a belt you can loosen after eating are nice to have too

Stuffing, mustard, cranberries, turkey and bread.
Prep:

1-Spread your chosen condiment(s) on the bread or loaf.

2-Pile on your turkey dinner fixings in any order you choose. My personal favorite is turkey (dark meat, if possible), then stuffing, then topped with cranberries. We almost never have mashed potato leftovers, so I haven’t tried them on the sandwich. Hopefully I will someday.

Ready for stacking and snacking upon.

3-Stack the sandwich closed. This part is a bit messy but worth it.

4-Enjoy with a Cranberry Ginger Ale. If you’re lucky enough to find the real Canada Day stuff, good for you! If not, top up your half-full glass of ginger ale with cranberry juice.

Stacked to perfection.

My sandwich was good and thick and biting into it brought back many memories of Thanksgiving Dinners past: at home with my family in Canada and here in France with seven other families that make up one big combined, extended family. Always great times with great people on both sides of the Atlantic.

A question I’d like to put out there in the blogosphere – to heat or not to heat?

I didn’t heat mine and it tasted just fine, but when my husband made his, he pre-heated the leftovers before assembling his sandwich. It comes down to personal preferences and I’d love to hear your thoughts.

My husband's version, baguette style.

I hope this post gets you inspired with something fun to try after your next turkey dinner. For those of you who aren’t hosting and therefore don’t necessarily get leftovers, I hope your host sends you home with a care-package so the holiday gluttony can last for a few more days. Whether you eat your leftovers heaped on a plate or piled high in a sandwich, the end result should be the same: the satisfied silence of a turkey-dinner coma, complete with a full belly and a loosened belt.


Gobble, gobble, Sandwich Lovers. Eat up!

Tuesday, June 16, 2015

Baked Potato Grilled Cheese

In my constant search for sandwich-inspiration, thank goodness for the Internet!

I recently found an epic list of different grilled cheese incarnations, henceforth to be referred to as The List, and after I wiped the drool off my chin, I faced the difficult decision of which one to make. The Baked Potato Grilled Cheese won out and I’m super excited to share my vision of it with you.


To create this sandwich edition of a baked potato with all the fixin’s, you will need:

-2 Large Baking Potatoes (Russets are good)
-Bacon
-Sharp cheddar cheese
-Sturdy sandwich bread
-Green onion
-Sour cream or crème fraîche


Prep :
1-Fry the bacon until crispy, then cut it into small bits.
2-Shred the potatoes and fry them up like hash browns (in the bacon grease, if that’s how you roll).
3-Slice the onion and grate the cheese.
4-Assemble the sandwich and insert some toothpicks to hold everything together.


Cooking:
I tried to grill them in the skillet like a regular grilled cheese, but the abundance of ingredients made it difficult for the sandwich to melt together and flipping it was basically impossible. So I did what one does when making stuffed baked potatoes: I baked them in the oven! They only needed 15 minutes total, but I rotated the pan at halftime so make sure they cooked evenly.

I served them immediately with a side of sour cream. So good! The onions were the unexpected star of this sandwich, as they added a nice spicy flavour and heat, while complimenting the bacon and the potatoes. This is a super-filling sandwich on its own, but I recommend adding a side salad to balance out the hot-mess of melted cheese and bacon grease.


It doesn’t have to be Grilled Cheese Month to enjoy this type of sandwich. If you’re feeling adventurous and creative, consult The List - and the blog! - for some excellent sandwich-spiration. 


Happy Grilling and Sandwich Eating!

Sunday, June 1, 2014

Thinking Outside the Bread Box – The Versatile Tortilla

Versatility, thy name is Tortilla.

This statement may come across as overdramatic, but it’s completely true.

The Tortilla is an impressively adaptable substitute for bread for sandwich-type endeavors. This makes sense considering tortillas have been around since the time of the Aztecs. They are traditionally made from corn dough called masa, shaped by hand and seared each side on a hot griddle. Today they come in all sizes and flavors – whole wheat, three cheese, sundried tomato, spinach, etc. -  and they can be stuffed with anything, hot or cold, and shaped into whatever configuration suits your taste.

Versatile tortillas use versatile ingredients.
To prove this and to celebrate the fun and flexibility of the Tortilla, I present you with three different tortilla experiences: a Wrap, a Quesadilla and a Burrito. These three tortilla-based meals can be made with very similar ingredients, depending on what you feel like. If you can't decide which one to make, there's nothing stopping you from making all three at once. Just be creative with what you have and go for it!

The Ranch Chicken Salad Wrap needs:
-Tortillas, any flavor will do
-Romaine or Iceberg lettuce, washed and torn into small bits
-Cooked chicken breast, chopped into small pieces
How stuffed can wraps get?
-Tomatoes, diced
-Red peppers, sliced
-Parmesan cheese, grated
-Ranch Salad Dressing

Prep:

1-Toss the lettuce, chicken, tomatoes and ranch dressing.
2-Spoon the salad mixture into a line down the centers of the tortillas.
3-Sprinkle with Parmesan cheese and add slices of red pepper.
4-Fold up the bottom of the tortilla to the centre and fold the outer ends over each other, leaving one end open.
5-Carefully place the wrap on a plate, folded side down, to keep everything together.
6-Eat it carefully to avoid it coming unwrapped. Enjoy! 

All wrapped up in tortilla goodness.
Two layers of grated cheese tops this quesadilla.
Since wraps are incredibly quick and easy to make, the hardest part will be deciding what to put in yours! Experiment with different fillings, hot or cold, and see how stuffed you can make them. There is another folding technique that completely closes the wrap off, which can be good if the one you’re making is double-stuffed and needs the extra containment. I personally prefer the open end because I can easily top it off with extra wrap stuffing.  Just like the tortillas that hold them all together, wraps are deliciously multipurpose and underrated. 


The Spicy Chicken Quesadilla needs:

-Tortillas, any flavor will do
-Cooked chicken breast, seasoned to your liking and chopped into small pieces
-Cheddar and mozzarella cheese, grated
-Red or green peppers, diced
-Tomatoes, diced
-Banana peppers or *Jalapenos (if you dare!), diced
*If you are chopping up jalapeno peppers, be very careful not to touch your face, especially your eyes, when handling jalapenos! Wash your hands and chopping station thoroughly to avoid unnecessary pain and suffering. Canned jalapenos are a safe alternative as well.*
-Sour cream
-Salsa
-Guacamole (store bought or try making it yourself!)

Prep:

1-Sprinkle a thin layer of grated cheese on half a tortilla.
2-Pile on the chicken, peppers/jalapenos and tomatoes.
3-Top with one more layer of grated cheese.
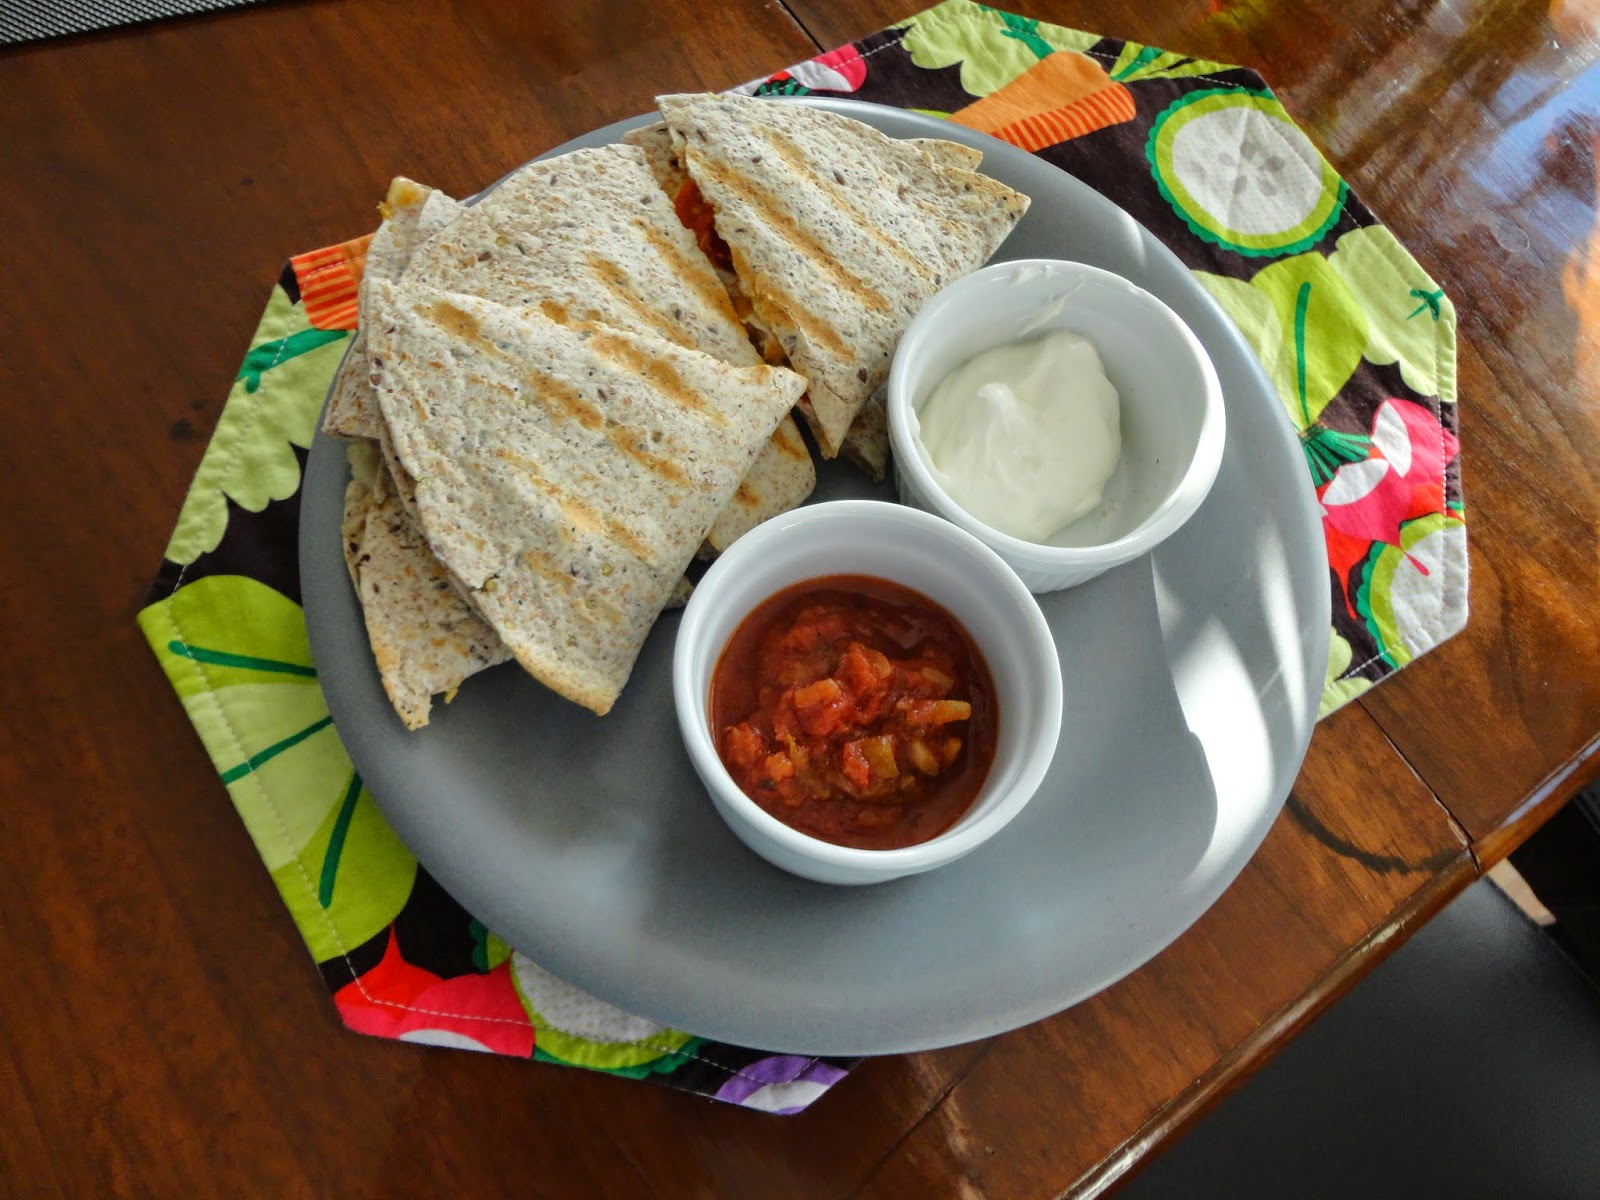
3-Fold the tortilla in half and carefully place it on a hot Panini press for 3-4 minutes.
4-Remove from heat when golden grill marks are visible and the insides are melted.
5-Slice the quesadilla into triangles and serve with sides of salsa and sour cream. 

Complete with salsa and sour cream. Guacamole is also a good side.
This Quesadilla makes a filling meal or satisfying snack. I like to season the chicken with some chili or cayenne pepper for some extra oomph. The spicy banana peppers are my favorite part; since I’m not quite ready to go all out with jalapenos, they add some heat without the complete searing of taste buds and don’t make downing ice water a requirement for enjoying this meal. 


Go as spicy as you want!

The Bean Burrito needs:

-Tortillas, any flavor will do
-1-2 cups cooked rice
-1 can of a Bean Medley (red kidney beans, chick peas, etc.)
-1 Tbsp olive oil
-1 small onion, diced
-1 Tbsp minced garlic
-1-2 tsp chili or chipotle pepper (depends how spicy you want it)
-2 tsp cumin
-Sharp cheddar cheese, grated
-Red, green or yellow peppers, diced
-spinach (optional; depends how stuffed you want it)

Stuffed to the brim with rice, beans and veggies.
Prep:

1-Cook the rice per the instructions (if using a rice cooker, make sure you add enough water and a little oil, to avoid the rice drying out/getting crunchy)
2-Add the oil into a heated skillet and sauté the garlic and onion until soft, about 5 minutes.
3-Rinse the beans and add to the oil, garlic and onion.
4-Add the spices and mix to coat the beans evenly. Cook for another 5 minutes or so.
5-Scoop the rice and beans into a line in the center of your tortillas.
6-Pile the veggies and sour cream on top.
7-Carefully fold the bottom up to the centre and fold the outer end over each other.
8-Flip and place folded side down to seal it.
9-Enjoy!

This bean burrito adds a vegetarian option that’s super filling and very healthy.  Experiment with your favorite spices and vegetable toppings to make yours truly unique. You might even want to try seasoning the rice with a splash of lime juice and some chopped fresh cilantro (excellent flavors!). If you're not into beans - you should be because they're tasty and extremely good for you - season chicken or slices of steak with the same spices.


Whether you make it into a wrap, a grilled quesadilla or burrito, your tortilla is sure to please because versatility makes any sandwich experience fun and uniquely yours.

Thursday, May 1, 2014

A Stack of Waffle Grilled Cheese

University: a place of discovery and learning.

It was during my first year that I discovered I hated living in res and I learned how to live away from home.

Other poignant discoveries were that I liked coffee (thank you and miss you, Java Jive!), that the U of A campus in fall is one of the most beautiful places in Edmonton, that the stairwells of the Fine Arts Building are a great place to meet people and rehearse directing projects, and that walking into the Engineering building with your Complete Works of Shakespeare will get you a lot of funny looks.

And I learned to love that campus and my time there like no other time and place.
This sandwich is one of my proudest student achievements.

Being a university student also forced me to learn how to cook for myself. It wasn’t ever fancy or all that pretty but I learned because I had to and because there was only so much Subway or Edo that I could stomach. By the time I earned both my degrees, I had also graduated from Kraft Dinner and had moved on to other meals. But the one student meal I love to bring back from time to time is the Waffle Grilled Cheese

I wish I could say this sandwich was born from a great stroke of culinary inspiration but it was the stack of dirty dishes marinating in the sink that forced me to find another way to make a midnight study snack. It was out of desperation, and I’d like to think a subconscious sense of courtesy towards the upstairs neighbors that I wasn’t about to tackle the dishes at that hour, that I turned to the waffle iron I got for Christmas.

That silent, reliable, quick-heating waffle iron then became one of the best gifts I had ever received. In the student days - and in some of the first-year-teacher days - I used it more for grilled cheese than for waffles. It always saved on dishes and time and it got the job done with only a little mess. Plus, the waffle ridges are perfect for holding lots and lots of ketchup, salsa or hot sauce.

About to become golden and waffle grilled.
Like any good student meal, the required ingredients are minimal (Got bread? Got cheese? Got power? Go!), but for this post-grad version, I added some bonus ingredients to tackle that other great student meal – breakfast for dinner!

You will need:

-A sturdy waffle iron
-Sandwich bread, any kind
-Mozzarella cheese
-Cheddar Cheese
-Eggs, fried sunny-side up with the yokes medium done
-Sausage patties
-Ketchup or your choice or condiment
The sizzling means it's working.

The Process:

1-Plug in the waffle iron and let it heat up.
2-While it’s heating, fry the sausage patties and the eggs.
3-Slice the cheese and arrange on the bread slices.
4-Once the eggs and sausages are cooked, layer them on top of the cheese on one slice of bread.
5-Top of the sandwiches with more cheese and the other bread slices.
6-Carefully place the sandwiches in the waffle iron and close it up as best you can.
7-As the sandwiches grill, press the waffle iron down gently to compress them more compactly.
8-Let grill until the waffle ridges are golden and the insides are melted.
9-Remove from heat, slice and serve with your favorite topping.

Definitely one of the quickest and easiest grilled cheeses I’ve made, but the real fun is in the presentation. Stacked up on each other, they resemble an ordinary pile of glistening waffles, fresh from the grill, just waiting to be drowned in butter and syrup. But these are special waffles stuffed with spicy sausages and smothered in gooey, melted cheese. Try adding your favorite spices to the eggs for a little something extra and swap out the syrup for a hearty drizzling of ketchup. Eat it with a knife and fork or get greasy with your hands, in true grilled cheese style.

I traded-in the student-poverty and exam angst when I finished degree #2 in 2009 and finally moved above ground. To quote the teacher that I've now become, "the learning never ends" and although I’ve moved on in so many ways, that waffle iron has always come with me. Even now when I own a small sandwich grill, it’s still fun to haul it out for some Waffle Grilled Cheese so I can appreciate where I was and how much I still discover and learn each day.

Monday, March 31, 2014

Peanut Butter and Jam Stuffed French Toast

Sandwiches are Beautiful would not be a true sandwich blog without a Peanut Butter and Jam post.  Since my peanut allergies prevent me from trying this classic sandwich, I’m proud to present the following post by my friend and fellow food blogger, Caroline Lyster. Enjoy!

Peanut Butter and Jam: the early stages.
I’m not usually a sandwich person, but I couldn't say no when Erin asked me to write a post for her blog.  Luckily, the sandwich she had in mind for me is one of the few that I absolutely adore: Peanut Butter and Jam.

Whether you’re partial to jam, jelly, honey, or bananas, the key is mixing something sweet with the salty goodness that is peanut butter (or another nut butter if you are so inclined).  It’s easy to make, and pretty healthy if done the right way (Protein packed peanut butter (in moderate quantities)! Whole grain bread!).  And, of course, it’s just flat out delicious.

Because PB&J is so easy to make talking about the sandwich itself would not be a very long post (PB on one side, J on the other…consume and enjoy).  So I decided to get creative, and make my childhood lunchtime staple into something better served with a mimosa in hand: stuffed French toast.

French toast was another staple at my house growing up: we used to get lots of homemade bread and rolls from my grandmother, and these tend to go stale faster than your average store bought loaf.  The solution was simple: soak the slightly stale slices in a custardy mixture of eggs, milk, sugar, and vanilla (allowing them to get moist and flavourful), then fry in butter (allowing the outside to get crispy while the inside remains creamy), and smother in maple syrup.  For stuffed French toast the basic method remains the same…the only thing you do differently is make your slices of bread into a sandwich before you soak them!

PB&J Stuffed French Toast needs:

-bread of choice, 2 slices per sandwich (it’s okay if it’s a little stale)
-peanut butter (my personal preference is for crunchy)
-jam of choice (strawberry is the classic)
-4 eggs
-1 cup milk
-2 tablespoons brown sugar (or any other sweet ingredient…syrup would work just as well)
-1 tablespoon vanilla
-a dash or two of cinnamon (if you’re so inclined)
-butter (to keep the French toast from sticking to the pan)
-a large frying pan

Optional…taking direction from Chef Michael Smith, I chose to crust my stuffed French toast with some oatmeal (making the outside extra super crispy).  If you want to do this you’ll also need one or two cups of rolled oats.

Crusted with oatmeal, ready for the frying pan.
How to:

1) Heat the pan that you will be using; medium is high enough.  You don't want the pan to be too hot or the outside of your sandwich will burn before the inside gets warm and creamy.

2) Make the PB&J sandwiches: peanut butter on one side, jam on the other (or, if you’re a true peanut butter lover, peanut butter on BOTH sides with jam in the middle).

3) Mix the eggs, milk, sugar, vanilla, and cinnamon in a large bowl.  Dip the sandwiches in the eggs mixture

If you've decided to crust your sandwiches with oatmeal à la Michael Smith, do this after they've been soaked in the eggs and milk.

4) Melt the butter in your frying pan, then add the sandwiches.  Fry slowly (be patient!) until they are golden brown, then flip them over and do the same on the other side.

That’s all there is to it…your stuffed French toast is now complete!  If you’d like, you can top them with syrup to complete the brunch effect, but they’re just as delicious without.

PB & J Stuffed French Toast: a new twist on a classic sandwich.
The great thing about this particular recipe is that once you've got the method down you can really stuff anything you want into your French toast…it doesn't have to be PB&J!  Chef Michael suggests mixing jam with cream cheese and using this as a filling and as a cheesecake lover,
I am definitely going to give that a try.  You can also experiment with other combinations of nut butter/sweet filling…almond butter with honey perhaps, or Nutella with bananas!  The possibilities are endless, and delicious!

For more information, check out Michael Smith's recipe and video.

Caroline Lyster is a graduate student with far too much free time on her hands, most of which she spends in the kitchen. As of right now she lives in Montreal, but now that she has finished her Masters she will soon be off to start a new adventure in a new city (with her giant box of cookbooks in tow). She is the author of Cooking=Love, though the blog is currently on hiatus as she has been quite busy finishing her thesis...she's done now, so be on the lookout for new posts featuring delicious (and mostly healthy) recipes, as well as little tips and tricks to get you cooking more often!