Showing posts with label onions. Show all posts

Sunday, January 31, 2016

Pulled Pork Perfection

Pork is a great sandwich staple and I enjoy a good ham sandwich as much as the next person. It’s classic, straightforward, no-nonsense meat that pair well with all kinds of mustards, cheeses and pickles. For a refresher on this concept and some inspiration to get you started, check out an earlier post from 2014, 3 Parts Mustard/2 Parts Pickles/1 Part Ham.

But it’s always fun to change it up and try something different and it’s even better when you have some outside help. So I must give the majority of the credit for this sandwich creation to my husband Mike, since it was his kitchen-wizardry that came through in a big and tasty way when we made our own Pulled Pork Sandwiches, on some fresh-from–the-bakery bread, topped with some lovely caramelized onions.

Pulled Pork Perfection, in 3 stages
To make your own Pulled Pork Perfection, you will need:

Leftover Pork Shoulder Meat, shredded

1/2 cup White Vinegar

1/4 cup Red Wine or Cider Vinegar

1/4 cup Balsamic Vinegar

1/4 cup Brown Sugar

1/2 cup Water

1/4 cup BBQ Sauce

1/4 cup Ketchup

2 tsp Worcestershire Sauce

1 Tbsp Spicy Mustard (heaping)

Fresh Ground Pepper, to taste

Caramelized Onions (optional)

Sandwich Bread, thickly sliced

Smells so good!
Prep:

1-Shred the pork meat with two forks and put in a pot on the stove.

2-Add the three kinds of vinegar.

3-Mix the water and sugar together and pour over the meat and vinegar.

4-Bring to a boil, uncovered for 10 minutes.

5-Turn down the heat, cover and simmer for 10 minutes. Uncover and let out the steam. Your kitchen will smell amazing at this point.

6-Mix the BBQ sauce, ketchup, Worcestershire sauce and mustard.

7-Pour sauce over the pork, mix and reduce heat.

8-Top with some fresh ground pepper and caramelized onions. They’re optional, but a very nice touch. Simply heat the sliced onion in a skillet with some olive oil and stir until they soften and brown slightly.

9-Assemble the pork and onions into sandwiches.

10-Serve warm and enjoy!

This pulled pork is tangy, sweet and just a touch spicy. You can always adjust the quantities of the vinegars to suit your tastes and play with different types of mustards and breads. It would pair really well with a cool, crisp coleslaw or salad. Think classic deli-style. Yum.

This is a great way to use up leftover pork shoulder meat from a Sunday dinner. It works well with bread and wraps stuffed with whatever you like. And it freezes well too. So with all that going for it, what’s not to be excited about?


Saturday, December 6, 2014

The 9 Hour Beef Dip

It’s been over a year since I’ve started blogging about the beautiful world of sandwiches and this next creation wins the award for having the longest cooking-time – 9 hours!

This is all thanks to an amazing kitchen appliance: The Slow Cooker, or Crock-Pot, whichever name you prefer.
A must-have for any busy household!
My slow-cooker is on my Top 3 Best Kitchen Appliances List along with the coffeemaker and the Bosch Mixer. I've had one ever since I moved out on my own and needed to learn how to cook for myself. When my husband and I first moved in together, we each had a slow-cooker and sometimes, used both of them at the same time! It was hard to decide which one to take with us to France. His won out, being slightly bigger, so I sent mine home to my parents; there was no way I could give it away to a stranger after all the lovely meals it provided over the years.

Slow-cooker meals are nearly impossible to mess up and when life gets busy, as it always does, it makes cooking good, hearty meals practically effortless. What better thing is there than coming home after a busy day to a delicious smell wafting through the house and your dinner nearly ready? 

The 9 Hour Beef Dip is my first slow-cooker sandwich creation and I was thrilled with how it turned out. After roasting the beef all day, it only took ten minutes to assemble and even less time to wolf down!
Quick prep for some slow cooking!

You will need:

1 Small beef roast
1 ½ Tsp each of thyme and rosemary
3 Garlic cloves, minced
2 Cups beef broth
2 Tsp teriyaki sauce
1 Small onion, chopped
Red and green bell peppers, one of each
Edam cheese
Baguette-style loaf of bread
Small bowls or ramekins for the dipping sauce

Prep:

1-Work backwards 9 hours from when you want to eat and get your roast in early.

2-Mix all the spices together and sprinkle on your roast, covering it entirely.

3-Place roast in the slow-cooker and cover with chopped onions and beef broth.

4-Cover with the lid and cook on low for 9 hours

5-No peeking! It’ll smell amazing and you’ll be tempted to lift the lid but according to my Fix-It and Forget It Cookbook, “every time you take the lid off, the cooker loses steam…and it takes 20 minutes to regain lost steam and temperature.” Just relax and let it do its thing uninterrupted.

Gorgeous colours and softened just enough.
Sandwich Assembly:

1-About 10 minutes before you take the meat out, sauté the peppers in some olive until soft.

2-Remove the roast from the slow-cooker and carefully cut it into thin slices.

3-Slice the bread loaf and arrange beef slices, peppers and cheese inside.

4-Ladle some of the beef juice into the small bowls/ramekins for dipping.

5-Serve warm and enjoy!

Quick and easy sandwich assembly.

A note about dipping technique:


Submerge the sandwich into the dipping sauce as far as you can. The bread acts like a sponge and absorbs the tasty liquid, which softens the crust ever so slightly. The result is a tasty, hearty,savory, effortlessly made, beef dip sandwich.

Definitely worth every hour of waiting!
   
The 9 Hour Beef Dip

Sunday, June 1, 2014

Thinking Outside the Bread Box – The Versatile Tortilla

Versatility, thy name is Tortilla.

This statement may come across as overdramatic, but it’s completely true.

The Tortilla is an impressively adaptable substitute for bread for sandwich-type endeavors. This makes sense considering tortillas have been around since the time of the Aztecs. They are traditionally made from corn dough called masa, shaped by hand and seared each side on a hot griddle. Today they come in all sizes and flavors – whole wheat, three cheese, sundried tomato, spinach, etc. -  and they can be stuffed with anything, hot or cold, and shaped into whatever configuration suits your taste.

Versatile tortillas use versatile ingredients.
To prove this and to celebrate the fun and flexibility of the Tortilla, I present you with three different tortilla experiences: a Wrap, a Quesadilla and a Burrito. These three tortilla-based meals can be made with very similar ingredients, depending on what you feel like. If you can't decide which one to make, there's nothing stopping you from making all three at once. Just be creative with what you have and go for it!

The Ranch Chicken Salad Wrap needs:
-Tortillas, any flavor will do
-Romaine or Iceberg lettuce, washed and torn into small bits
-Cooked chicken breast, chopped into small pieces
How stuffed can wraps get?
-Tomatoes, diced
-Red peppers, sliced
-Parmesan cheese, grated
-Ranch Salad Dressing

Prep:

1-Toss the lettuce, chicken, tomatoes and ranch dressing.
2-Spoon the salad mixture into a line down the centers of the tortillas.
3-Sprinkle with Parmesan cheese and add slices of red pepper.
4-Fold up the bottom of the tortilla to the centre and fold the outer ends over each other, leaving one end open.
5-Carefully place the wrap on a plate, folded side down, to keep everything together.
6-Eat it carefully to avoid it coming unwrapped. Enjoy! 

All wrapped up in tortilla goodness.
Two layers of grated cheese tops this quesadilla.
Since wraps are incredibly quick and easy to make, the hardest part will be deciding what to put in yours! Experiment with different fillings, hot or cold, and see how stuffed you can make them. There is another folding technique that completely closes the wrap off, which can be good if the one you’re making is double-stuffed and needs the extra containment. I personally prefer the open end because I can easily top it off with extra wrap stuffing.  Just like the tortillas that hold them all together, wraps are deliciously multipurpose and underrated. 


The Spicy Chicken Quesadilla needs:

-Tortillas, any flavor will do
-Cooked chicken breast, seasoned to your liking and chopped into small pieces
-Cheddar and mozzarella cheese, grated
-Red or green peppers, diced
-Tomatoes, diced
-Banana peppers or *Jalapenos (if you dare!), diced
*If you are chopping up jalapeno peppers, be very careful not to touch your face, especially your eyes, when handling jalapenos! Wash your hands and chopping station thoroughly to avoid unnecessary pain and suffering. Canned jalapenos are a safe alternative as well.*
-Sour cream
-Salsa
-Guacamole (store bought or try making it yourself!)

Prep:

1-Sprinkle a thin layer of grated cheese on half a tortilla.
2-Pile on the chicken, peppers/jalapenos and tomatoes.
3-Top with one more layer of grated cheese.
3-Fold the tortilla in half and carefully place it on a hot Panini press for 3-4 minutes.
4-Remove from heat when golden grill marks are visible and the insides are melted.
5-Slice the quesadilla into triangles and serve with sides of salsa and sour cream. 
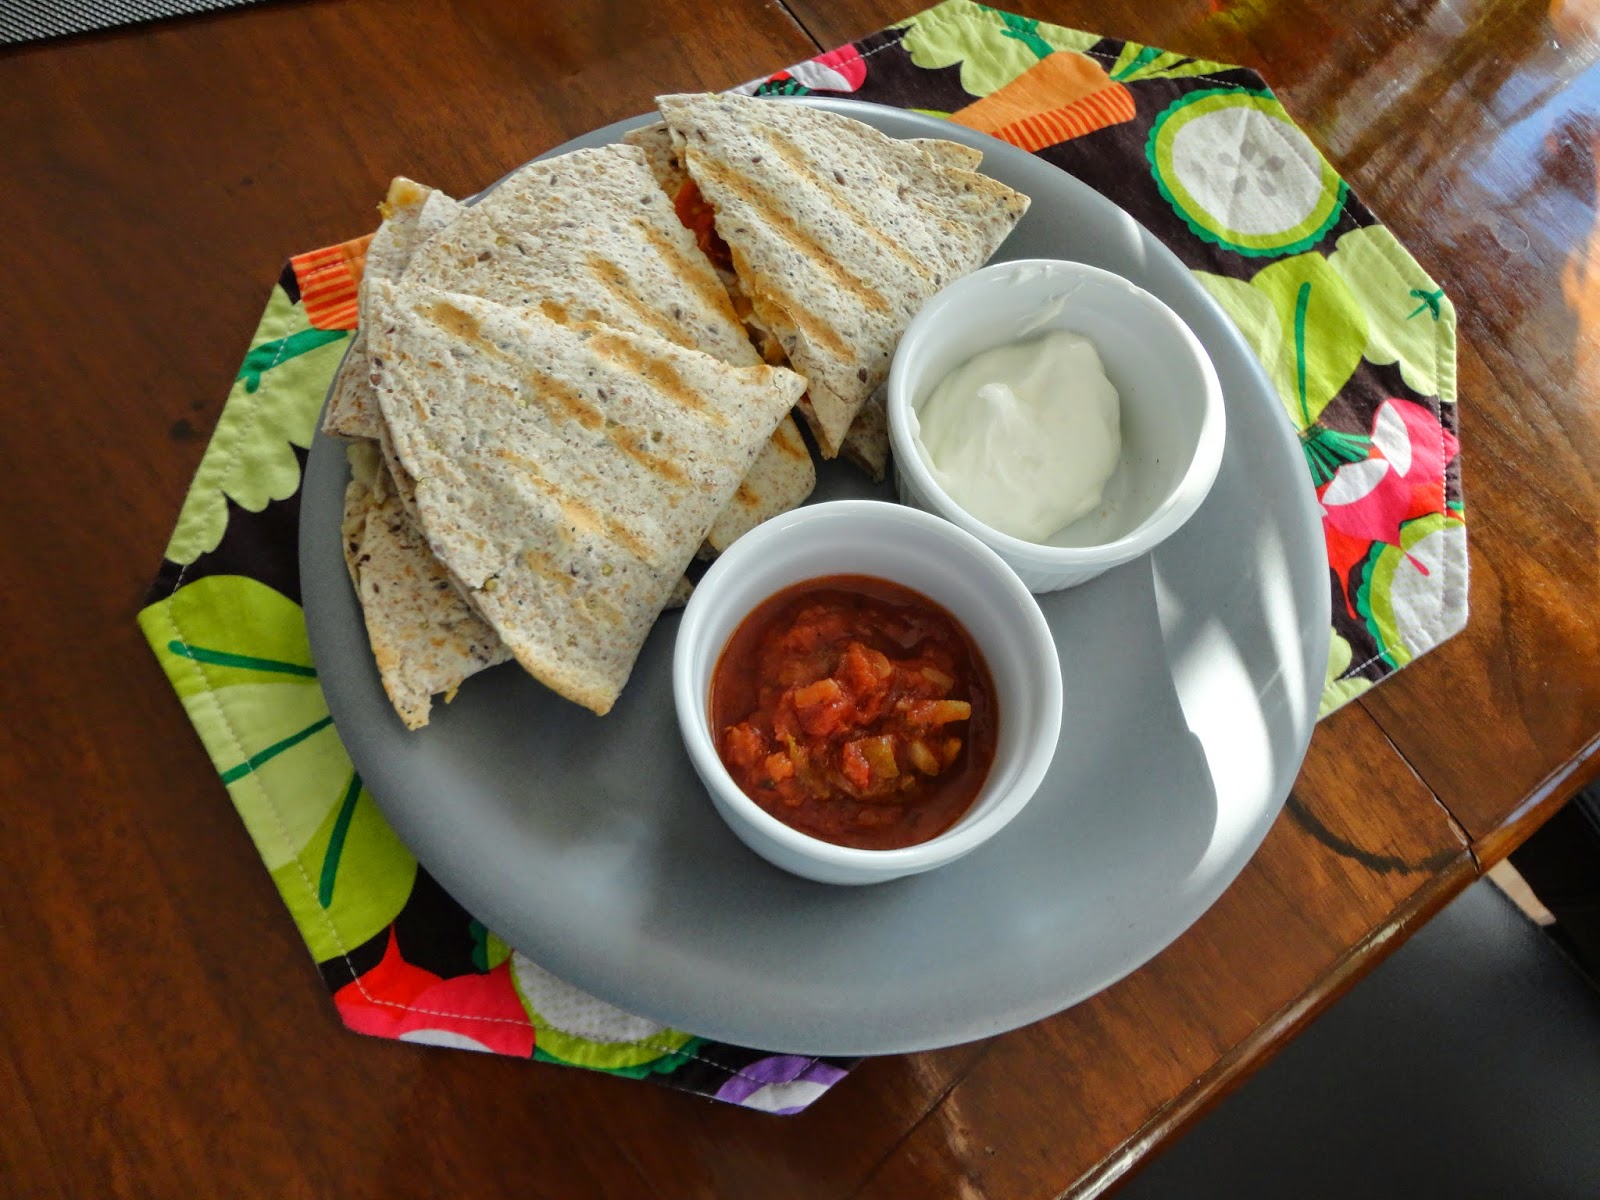
Complete with salsa and sour cream. Guacamole is also a good side.
This Quesadilla makes a filling meal or satisfying snack. I like to season the chicken with some chili or cayenne pepper for some extra oomph. The spicy banana peppers are my favorite part; since I’m not quite ready to go all out with jalapenos, they add some heat without the complete searing of taste buds and don’t make downing ice water a requirement for enjoying this meal. 


Go as spicy as you want!

The Bean Burrito needs:

-Tortillas, any flavor will do
-1-2 cups cooked rice
-1 can of a Bean Medley (red kidney beans, chick peas, etc.)
-1 Tbsp olive oil
-1 small onion, diced
-1 Tbsp minced garlic
-1-2 tsp chili or chipotle pepper (depends how spicy you want it)
-2 tsp cumin
-Sharp cheddar cheese, grated
-Red, green or yellow peppers, diced
-spinach (optional; depends how stuffed you want it)

Stuffed to the brim with rice, beans and veggies.
Prep:

1-Cook the rice per the instructions (if using a rice cooker, make sure you add enough water and a little oil, to avoid the rice drying out/getting crunchy)
2-Add the oil into a heated skillet and sauté the garlic and onion until soft, about 5 minutes.
3-Rinse the beans and add to the oil, garlic and onion.
4-Add the spices and mix to coat the beans evenly. Cook for another 5 minutes or so.
5-Scoop the rice and beans into a line in the center of your tortillas.
6-Pile the veggies and sour cream on top.
7-Carefully fold the bottom up to the centre and fold the outer end over each other.
8-Flip and place folded side down to seal it.
9-Enjoy!

This bean burrito adds a vegetarian option that’s super filling and very healthy.  Experiment with your favorite spices and vegetable toppings to make yours truly unique. You might even want to try seasoning the rice with a splash of lime juice and some chopped fresh cilantro (excellent flavors!). If you're not into beans - you should be because they're tasty and extremely good for you - season chicken or slices of steak with the same spices.


Whether you make it into a wrap, a grilled quesadilla or burrito, your tortilla is sure to please because versatility makes any sandwich experience fun and uniquely yours.

Thursday, March 13, 2014

I Heart the New York Bagel Café

It had me at the mustards.

The first thing I saw after I crossed Gateway Boulevard and stepped into the New York Bagel Café was the centre-piece of mustards, hot sauces, jams and honeys grouped together on each table and I fell for NYBC.

Great centerpieces and menu!
How could I not?! There were three kinds of mustard on my table and I hadn’t even seen the menu yet!

It was my first time venturing into the little bistro on Gateway and 84 Ave and I was excited to take myself out for lunch for a different kind of sandwich experience and finally discover its appeal. I caught it at a quiet moment in the afternoon, which is a rare thing since I've heard that comfortable space is bursting with people during a post-Farmer’s Market run on the weekend. I was grateful for the quiet, as it gave me time to take in the friendly vibe - and to study the incredible menu.

The range of choices is definitely impressive for a place that size. NYBC has an extensive breakfast menu with over 20 different Eggs Benedict combinations, plus a solid selection of meat-free bennies and fresh perogies every day. But seeing as it’s the New York Bagel Café, there was really only one option I was willing to consider.
Not the average sandwich menu...

Or so I thought… 

After reading through and visualizing/taste-alizing (like visualizing, only with taste) the remarkably long list of bagel platters, I went with a classic: Lox and Cream Cheese. On white, whole wheat, cheddar or pumpernickel? Or rye bread? While I was tempted by the different options, I chose the whole wheat bagel.  What better way to be ease into this new eatery than with a tried-and-true selection?

It’s always exciting to wait for your food the first time you visit a new restaurant and I enjoyed my wait.  The eclectic music of lively Latin beats, bohemian guitar and the gravely vocals of Leonard Cohen added to the laid-back, slightly off-beat atmosphere. There was even a stack of Far Side comic books to peruse through while I anticipated my lunch's arrival.

Lox and Cream Cheese: an NYBC classic.
New York Bagel Café gets full marks for food presentation! My chosen bagel platter was a beautiful sight to behold: an artfully arranged, colourful spread of brown bagel, rusty-coloured lox, khaki capers and crisp white cream cheese and onions - plus a sour dill pickle on the side.

Since I am that person who takes photos of their food in public, I quickly snapped a few images on my phone and started in on my bagel masterpiece.  

Taking full advantage of the DIY factor involved, I laid the cream cheese on thick, then piled on the lox, capers and yes, the onions because apparently, I like them now!, and I savored that beautiful first bite.

Don't hold the onions - they're great on this bagel!
Really lovely flavours and textured emerged as I ate up my bagel: the smoky, oily salmon, the sharp crunch of onions and the peppery capers. Alternating crunchy bites of bagel with sips from the frothy blend of espresso and chocolate and warmth that was my moca, I thoroughly appreciated the experience of NYBC. 

It’s a good food restaurant, not a fast food one, as a small sign on the bar indicates, so go when you have time to sit, relax and be intrigued by different bagel combinations, intense coffee selections and the varied collection of condiments on your table.  Don’t rush your New York Bagel Café experience; take your time to delight in its charms.

The only unfortunate part of the afternoon - I didn’t get to try all the mustards on my table. But I’m looking forward to going back so I can see which bagel platter pairs well with my beloved whole gain Dijon…

It may take more than one trip back to find it, but I’m up for the challenge!


Tuesday, February 25, 2014

Epic Sandwich Party!

Planning a party is usually one of two potential things: it’s really fun or it’s really stressful. There’s a lot to do and never enough time and dealing with the food aspect is usually the biggest source of stress. I wasn’t sure what to do for my recent 30th birthday, but when it became an Epic Sandwich Party, all stress went right out the window - right along with my 20's!

Epic Sandwich of stacked proportions!
The rules of the Epic Sandwich Party are just like those that govern general sandwich creation: there are no rules! Any kind of sandwich can be created with a few key ingredients and this creative freedom brings out the fun – and sometimes weird – tastes of your guests.  Plus having your guests make their own sandwich masterpieces takes all the cooking pressure off you, the host, so you can spend more time mingling and partying with your people!

Three Major Reasons Why Epic Sandwich Parties Rock:

1-You can’t please everyone, but everyone can please themselves:

The dollop of grainy mustard makes this sandwich epic!
Let’s face it – if you try to plan your party’s menu so everyone is consistently happy, you’re in for a disappointing evening. People’s tastes are too different and with so many different eating styles (vegetarian, vegan) and/or food restrictions (gluten-free, allergies, etc.), coming up with something that everyone can eat is pretty near impossible. But an Epic Sandwich Party empowers everyone to please themselves. If you provide variety in meat, bread, veggie and side options (I’ll get to the Shopping List in a moment), you are appealing to broad tastes and letting your guests get more specific for themselves. You might not think that toasted rye bread with raspberry jam and sharp cheddar tastes good (it really does, just so you know!), but you don’t have to because your guests will think up their own food and everyone’s happy because they take care of themselves.

It's enormous! Or is it...?
2-Epic Sandwich Parties are Very Kid-Friendly:

There are lots of kids in our circle of friends and family and I wanted them to feel welcome. An Epic Sandwich Party is a fun and super easy way to include the little ones in the festivities.  Kids love sandwiches!  And getting to make their own can appeal to even the pickiest of eaters. My six-year old nephew made the first sandwich of the party and he was so excited to have that honor. I pointed out the different choices he had and he considered each one thoughtfully before putting together a Roast Beast (beef), Cheese and Ketchup Sandwich. It was just what he wanted! All the kids at our party seemed to have fun building their own sandwiches, which made their parents happy and able to have fun too!

3-The prep is so minimal, it’s hardly prep!

Just stock up on sandwich essentials, add some general party junk food, chill the drinks and you’re good to go! Have some napkins, plates and cups standing by and let everyone be inspired to create their own sandwich greatness.

You can’t go wrong with this basic Shopping List for your Epic Sandwich Party:
So many tasty ingredients!

Bread: 3-4 different kinds, such as:
Basic Sourdough
Rye (dark and light)
Multi-grain
Buns (my Dad brought his special homemade buns and they did not last long!)

Meat: Variety is key!
Turkey breast, like Lilydale’s seasoned and roasted turkey breast slices
Roast Beef
Montreal Smoked Brisket
Spicy Capocolo
Smoked Prosciutto
Bacon
Turkey, sliced applies and sharp cheddar!
Veggies/Fruits:
Lettuce (spinach and mixed greens)
Tomatoes
Peppers
Onions
Mushrooms
Granny Smith Apples, thinly sliced
Sprouts
Avocados

Cheese:
Sharp Cheddar
Mozza
Jalapeno Havarti
Goat Cheese
Grilled roast beef, mushrooms, and 3 kinds of cheese!
Condiments:
Mustards (plain yellow, spicy, grainy, Dijon, Honey, Cranberry)
Mayo (plain and Dill)
Butter
Pickles
Banana Peppers
Ketchup
Hummus

Sides:
Potato chips (your favorite kinds!)
Veggies and Dips (carrots, broccoli, cauliflower)
Grapes
Potato salad

Drinks:
Root Beer
Orange Pop
Coke
(just add ice cream for floats!)

...and don't forget real beer for the adults!

Special Equipment:
Skillet/Grill for those who want a grilled sandwich experience

This party wouldn't have been complete
without an Epic Sandwich Birthday Cake! 
Dessert:
Cupcakes
Ice Cream
...and Epic Sandwich Birthday Cake!

Convinced now? I hope so! Our guests had fun building their own epic sandwiches and we did too! For your next gathering, forget the planning stress and throw an Epic Sandwich Party instead!


Monday, December 30, 2013

A Burger at The Works

As my Maritime holiday continues, so does my quest for new beautiful sandwich and travel experiences!  

After a brief stop (delay) in Montreal, the holidays were spent visiting family in Fredericton and catching up with some old friends in Halifax. 

I have never traveled to this part of Canada before and a few things need to be stated right off the top:
  1. I have never seen more beautiful and picturesque winter landscapes than those of New Brunswick and Nova Scotia. 
  2. The people– especially our dear family and old friends, plus the new ones we’ve met – are such kind, funny and wonderful people.
  3. The food is absolutely incredible.
Today’s adventure brought all these statements together in the fun atmosphere, great company and absolutely amazing burgers at The Works Gourmet Burger Bistro in beautiful Halifax, Nova Scotia.

What?! Burgers?! Isn’t this a sandwich blog?!

This menu is incredible!
Absolutely.   I declare the burger to be a full-blooded member of the sandwich family. If you ever visit The Works, you will understand. 

Our friend took us there for lunch and it did not disappoint. They serve their beverages in measuring cups and their menu consists of over forty different burger and topping combinations with witty names like Born to Brie Wild (mushrooms, brie and bacon) and Son of a Beech (avocado, beechhouse sauce, sundried tomato and feta).  (The blogger in me definitely loved the burger names and when I told our server that I write a food blog, she gave me one of the brown paper menus as a souvenir!)  You even get to pick what your patty is made of: 100% Canadian beef, chicken breast, ground turkey, Portobello mushroom cap, or Gourmet Veggie.  You can even get Elk.  

Elk!  So Canadian!!

The Tower-O-Rings, with my Root Beer in
a measuring glass
Needless to say, it took a while for us to narrow down what to order.  While we agonized over the menu, we enjoyed the Tower-O-Rings, the best, most crispy and golden onion rings I’ve ever had.  I finally decided on the Nacho Libre Burger, which consisted of red, gold and blue tortilla chips, 5 kinds of cheese (!), sour cream, salsa and onions, with a side of fries, naturally.

It was the most beautiful burger I’ve ever seen with the colourful tortilla chips, huge dollop of sour cream and did I mention it had 5 different kinds of cheese??  Amazing!  I actually had to roll up my sweater sleeves to eat it.  The whole wheat bun was soft and fresh for each bite of burger patty, chips, salsa and 5 different kinds of cheese.  It was drippy and slightly messy but you just have to know that attempting to eat a burger that full isn’t going to be neat and tidy.  The fries also deserve credit for being the right combination of warm and crispy and topped with some malt vinegar, just the right side for that most delicious burger.

The Nacho Libre: a beautiful burger and definitely not a Jack Black movie.
My two dining partners were also thrilled with their respective choices: the Cracker Jack (peppercorn crust, banana peppers, jack cheese and ‘hotter than hell sauce’) and the Pony Express (horseradish, cream cheese, hot sauce, cheddar and tomato), both served with the Spicy Die-Cut Chips (I stole a few and they were great!).  We devoured our burgers in our comfortable booth, while the classic rock songs of Tom Cochrane and Rush played in the background and shared the great conversations that occur when old friends catch up in a beautiful old city, over a delicious meal.  Simply being with them, my husband and my dear old friend from university, in that fun and friendly place, (with excellent service, I might add) laughing and stuffing our faces, was more than just a meal.  It was an experience. 

And did I finish my Nacho Libre Burger?  Nope! 

But this time, I blame the onion rings.

Planning a trip to Eastern Canada? Make sure to check out The Works Gourmet Burger Bistro!