Showing posts with label veggies. Show all posts

Monday, August 8, 2016

A Thrown Together (Sandwich) Story

A low rumble roused me from my brief sleep.

My eyelids flew open and I jolted myself up, ready for action. Other than the strange rumbling sound, it was still quiet. I let out a long, silent sigh but the mysterious rumbling returned. It was a moment before I realized, with relief, it was coming from my stomach.

I needed food.

I paused briefly at the mouth of The Monster’s den and listened intently. The barely audible ‘shh, shh’ of The Monster’s breath was the only sound.

I crept silently and stealthy, avoiding the creaky steps with practiced precision. A small grunt suddenly pierced the silence.

The Monster was beginning to stir. I didn’t have much time.

I gathered up all the food I could find within reach: meat, cheese, bread. As I searched for something leafy, The Monster’s grunting grew louder.

I had less than two minutes now.

I pulled out a bundle of greens and barely stifled a curse as I noticed how damp and wilted they were and I had to throw them away.

The Monster’s grunts morphed into shrieks. Time was running out.

I piled the food together sloppily and crammed it into my mouth.

“I’m coming!” I called between chews with my mouth still full.

The Monster responded by shrieking and snorting more intensely.

Wiping my hands on a random cloth, I ran back to The Monster’s liar.

I was out of breath but ready; my hunger satiated, my energy restored. Thanks to the sandwich I’d thrown together and eaten in record time, I could resume my duties.

When The Monster saw me approaching, her snorts subsided and she reached out a pudgy hand towards me. Cooing instead of crying, a wide, gummy smile spread instantaneously across her face.

My Baby was awake and happy to see me, her Mom.

And then she realized she was hungry too…


*******************************************************************************************************

The above is a based-on-true-events story of some of my sandwich adventures as a new mom. In the past three months, I’ve made many a Throw-Together-Sandwich and it’s helped keep me going. It’s important to eat well and eat frequently while taking care of one’s baby. Since time between feedings, changings, and naps can be short, when you get the chance to grab something, DO IT!

I’ve said from the very beginning of this blog that the true beauty of sandwiches lies in how versatile and adaptable they are depending what you have on hand. A Throw-Together Sandwich is the absolute embodiment of this fact. Paired with other no-fuss snacks, like apples, bananas, dried cranberries, crackers, chocolate and potato chips, you’ve got a reliable standby meal in just minutes. And as my story shows, Moms sometimes only have minutes to refuel and recharge before getting back to their monsters.

I look forward to when I’ll have more time to make, enjoy and blog about sandwiches that are a bit more involved, but for now, I’m happy and thankful for fresh, non-wilted, non-gross sandwich ingredients, and for writing/blogging one nap at a time.

Some of my favorite Throw-Together Sandwiches are:

-Classic ham, cheddar, tomato and lettuce

-Salami, gouda and spicy mustard

-Leftover chicken, mayo, tomato and lettuce

-Turkey, any cheese and any vegetable; red and yellow peppers are great

Good luck to you all with your Throw-Together Sandwiches and a special shout-out to my fellow Mom Warriors on this crazy child-raising journey. We’re doing it, one sandwich, one nap, one day at a time.

PS. My husband and I refer to our girl as The Monster in a ‘My Pet Monster’/term of endearment way. She is a very content and generally sweet-natured girl…unless of course, she’s very hungry. :)

I cheated with the photo. These are not true Throw-Together Sandwich because no such photos exist.


Saturday, April 23, 2016

Mmmozzarella Meatball Subs

Remember when Joey on Friends swore his meatball sandwich was “the greatest sandwich in the world”? He loved it so much he even dove to ‘protect it’ from what he thought was gunfire, prompting Chandler to think he cared more about Ross, who was next to the sandwich, than him. 

Turns out it was actually a car backfiring and nobody and no sandwiches were ever in any danger but whatever - to Joey, it was worth taking a bullet for.


To quote Chandler, could there be any higher compliment paid to a sandwich?

Ever since I started this sandwich blog, I’ve wanted to make a meatball sub-style sandwich and revisiting this Friends episode reminded me that our previous attempts, while commendable and tasty, just weren’t quite blog-worthy yet. I knew we were close to something great; we just needed a little something extra…

So I consulted one of my new Jamie Oliver cookbooks and found the answer – our meatballs needed to be a mixture of beef AND pork. Another burst of inspiration had us tossing in some sautéed green peppers for another layer of flavour and with a side of Crunch Veggie Salad, we’d finally done it – our Mmmmozzarella Meatball Sub was ready to meet the world.

Mmmozzeralla Meatball Subs

You will need:

Ground Pork

Ground Beef – I’d recommend getting lean ground beef since ground pork is usually higher in fat content

Bread crumbs – we used our immersion blender to crumb-ify half a dried baguette; worked great

One egg

Minced garlic or garlic powder – we didn’t measure specifically but it looked to be around ½ - 1 Tbsp

Minced rosemary – around 1 tsp-ish

Fresh baguettes or sub-style loaves, 1-2 depending on how many sandwiches you want to make

Mozzarella cheese, torn into chunks

A jar of your favorite tomato-based pasta sauce – after experimenting in our previous attempts, we recommend one with a bit of a spicy kick, like our favorite Arrabbiata sauce from Barilla

One green pepper, sliced and sautéed

Process:

1-Combine the pork and beef in a big bowl and use your (clean) hands to mix it all together.

2-Add the egg and bread crumbs and keep mixing until the meat sticks together but isn’t too wet; add more crumbs to achieve this and add the spices.

Meatball process
3-Shape the meat into balls; try to make them the same size so they cook evenly.

4-Place the meatballs into an oiled pan and bake in the oven until they’re cooked all the way through. (You will probably have to sacrifice one to check, but you can still use it in your sandwich.)


Watching and waiting for meatball goodness

4.5-Make the Crunchy Veggie Salad:

            -Chop and combine red and yellow peppers, cucumbers, tomatoes, celery and crumbled goat/feta cheese in a bowl

            -Mix olive oil, cider vinegar, balsamic vinegar and oregano and pour over salad 

(Tip: If you make a big batch and know it will all get eaten, pour it over everything. But if you plan to eat this salad with a few meals, only pour the dressing over your individual serving to avoid it turning into a soggy mess.)

Crunchy Veggie Salad

5-Cut the baguette in half, length-wise and fill with meatballs and green peppers.

6-Pour pasta sauce on the meatballs and top with chunks of mozzarella.

7-Bake or broil the sandwiches in the oven, around 3-5 minutes, until the cheese is melted and the bread is golden.

8-Serve with a side of Crunchy Veggie Salad.

Mmm!

Definitely one of the most photogenic sandwich creations we’ve made.

The pork and beef combo work so well together, I can’t believe it took us this long to figure it out. One fun variation to try is to stuff the meatballs with mozzarella before you bake them. This makes for some oozy, cheesy meatballs, if that’s your thing. I could go either way on this, but the pork and beef togetherness are a must.

Meatballs are actually quite easy to make and there are so many recipes out there to experiment with, so don’t be afraid to roll up your sleeves and get in there.

Here are some meatball recipes to get you started – have fun! 


Joey would certainly approve.

Saturday, April 18, 2015

Crunchy Croque Monsieur

A Croque Monsieur is an inside-out grilled cheese!

I've been chowing down on this famous French sandwich since we moved here and I'm so pumped to share it during Grilled Cheese Month 2015.

Viola Le Croque Monsieur: an inside-out grilled cheese!

Croquer means 'to crunch' and the loud crunch it should make when you bite into it is how it got its name. Like the other great French sandwiches I've enjoyed, it has super simple ingredients: bread, ham, emmental cheese, for the inside, and melted Gruyere cheese on top.  

The tricky part of making this at home was finding the right bread. The beautiful artisan breads I love are also very holey, which isn't ideal for a grilled sandwich. Luckily, bakers are like pharmacists, since there are as many pharmacies here as there are bakeries, and if you go to one with a question, they can help you get what you need. So I went to the new bakery that just opened behind our house for some expert advice. The result was a very small, square loaf of bread, plucked fresh from the shelf. The slices were no bigger than small ceramic tiles in a bathroom, so I knew it would be a multiple Croque Monsieur meal.


Small bread makes a tasty, crunchy Croque Monsieur.
To create your own Croque Monsieur, you will need:

-Non-holey bread
-Ham
-Emmental cheese
-Mustard (optional, but you know how I feel about my spicy mustard!)
-Gruyere cheese for the top

Prep:

  1. Spread mustard on one slice of bread.
  2. Top with ham and slices of emmental.
  3. Assemble the other piece of bread.
  4. Sprinkle a thick layer of grated Gruyere on top.
  5. Bake in a pre-heated oven or toaster oven for 10 minutes/until the top is nicely melted and golden.  

Any kind of grilled cheese, inside and out, is a big favorite of mine but I can't deny that all that melted cheese alone is not super healthy. So I paired my Croque Monsieurs with another crunchy dish, a fresh Broccoli Salad, for a tasty serving of veggies and sweet fruit. 

Equally crunchy Broccoli Salad with apples and dried cranberries.


Prep for the Broccoli Salad:
  1. Rinse the broccoli and chop into bite-sized florerets.
  2. Chop up an apple and toss in a big handful of dried cranberries.
  3. Sprinkle with some grated cheese and toss in a cream dressing (to make a quick one, add some milk, white sugar and ground pepper to a big dollop of mayo and mix until thin.)
Mmm..crunch! What a lovely sound! The spicy mustard really made this Croque Monsieur pop! 

My stack of Croque Monsieurs was a great opportunity to break in my new sandwich tray! I found it in a fun gift shop on a recent trip to Brussels, Belgium. That shop reminded me of one of my favorite shops in Edmonton that closed last year, The Tin Box. I knew as soon as I saw the tray, it needed to come home with me and fulfill its purpose of serving up delicious sandwich meals. 

How awesome is this tray?! 


Happy Sandwich Making! Crunch!

Friday, February 20, 2015

Bridges, Poulet Crudités and Being in the Moment

One day during my ESL Teacher training course in January, I bought a baguette sandwich from the bakery two doors down on Rue Dauphine (right in the heart of the Latin Quarter, such a cool area!) and walked a few blocks north to Pont Neuf and ate my lunch right there on the bridge, overlooking the Seine.

Lunch on Pont Neuf: Poulet Crudité, jus de pomme et pain au chocolat.

Pont Neuf, contrary to its name, is not a ‘new bridge’. It was actually built in 1578 and it has two parts that span the right and left banks of Ile-de-la-Cite. It’s a beautiful place and I was needing a few minutes of calm during a very busy and intensive course. I remember planting myself firmly in the moment, taking a deep, yogic breath, and deliberately acknowledging: “This is my lunch break. I’m eating on Pont Neuf. In Paris. Wow!”

Because life gets busy sometimes. And we often forget to just take a moment and acknowledge where we are and what we’re doing. Sometimes, the scenery of everyday, anywhere, can start to blend together and we can lose track of calm, lovely moments that make life interesting.

So I chose to make that moment count and to enjoy every single bite of my delicious sandwich, there on one of the oldest bridges in Paris.

The sandwich I bought from that bakery was a Poulet Crudité, a chicken sandwich with vegetables and a salad dressing sauce on a crusty baguette. It was tasty and filling and kept me going through the busy afternoons of teaching, observing and planning during my course. Recently, I had some lovely leftover roast chicken and I was inspired to gather the ingredients and make my own version of the Poulet Crudité, right at home. And now, you can too!

Cheese and eggs
You will need:

-one baguette
-Mayo or salad dressing sauce, like ranch
-roast chicken breast, cut into bite-sized pieces or thin slices
-some cheese of your choice; we used some nice Bleu des Neiges, a combination brie/blue type cheese
-hard boiled eggs, sliced (1 egg per sandwich)
-tomato slices
-lettuce/salad greens

Chicken and Tomatoes


Prep:

1-Slice the baguette in half, lengthwise.

2-Drizzle the mayo/salad dressing on each half of the bread loaf.


4-Layer the bottom half of the bread with cheese, chicken, egg slices, tomato and lettuce.

5-Assemble the top half of the baguette, slice and serve. Makes two big, dinner-sized sandwiches!

Poulet Crudité: Pret a Manger!
This particular sandwich was eaten for dinner in the comfort of my own home, with the company of my husband. It may not be as exciting as a bridge in Paris, but it’s home and I enjoyed every bite of this sandwich just as much as I enjoyed the other one.

I want to mention that the first time I ate lunch on Pont Neuf, it was Friday, January 9 2015, the day there was a hostage situation underway in Porte de Vincennes. I didn’t know it was happening at the time and where I was in Paris, it was business as usual. The Paris attacks shocked me and my husband, as it shocked the rest of the world and we were quick to reassure our friends and family that we were safe.

Shocked though we were, we still went to the ballet at Palais Garnier that weekend, because life must continue. And the following week, I made a point to buy my lunch again (a different kind of  sandwich from the same bakery) and eat it on Pont Neuf. Because I refuse to live in fear and I want to keep looking for the good in my life, in the people around me, and in my surroundings.

And I’m happy to report that the view was just as picturesque and my sandwich was just as tasty as it was before! Paris is a beautiful and a tough city, having withstood a lot in her history, and I will continue to look for the good in it and take the time to deliberately acknowledge that I’m lucky and happy to be here.

One of my favorite lunch spots in a beautiful and tough city.

I hope you find the time to be in the moment and appreciate where you are, what you're doing and to find the good in it.

Thanks for your support and Happy Sandwich Making!

Wednesday, February 4, 2015

Ciabatta Goodness

Can you pronounce ciabatta?

It’s a tricky one – the ‘ci’ is actually pronounced like ‘chi’, so to say the name of this lovely bread correctly, try ‘chi-batta’. I actually looked up how to pronounce it – thank you Macmillan Dictionary and your audio clips for pronunciation!

Fresh Ciabatta Goodness!
This sudden attention to the pronunciation of foreign words is a result of the intensive English Teacher training course I recently completed at the International Language Center in Paris. I can now apply for English teaching positions and the world is wide open to me once again!

During my course, I brought my lunch from home as much as possible. This was helpful to save money, since buying lunch everyday can be expensive, and to save time, especially on those afternoons when I was teaching. I often brought homemade sandwiches made with ciabatta bread and stuffed with my favorite sandwich innards: multiple types of meat and cheese, veggies and mustard.

Stacked and Packed!
I can get fresh ciabatta bread  at my local grocery store and one loaf can make multiple sandwiches, depending on the size of my appetite: 3 small or 2 large. Ciabatta is lovely bread, crusty on the outside, soft on the inside, with lots of nice little nooks and crannies to hold reserves of mustard. It’s a worthy alternative to the baguette and it makes some pretty amazing sandwiches, both fresh and toasted.

A medley of goodness and ingredients
Possible ingredients for some Ciabatta Goodness include:

Meat: Ham, salami, sausage, roast beef, roast chicken or turkey
Cheese: Emmental, gouda, camembert (so good!)
Veggies: Feuilles de chêne (salad greens), arugula, spinach, avocado, red pepper, tomato, etc.
Condiments: Butter, mustard (multiple kinds in the same sandwich!), mayo

Prep:

1-Cut a fresh ciabatta loaf in half, length wise.
2-Spread butter and/or mustard on the halves, alternating or combining as per your tastes.
3-Pile on your choice(s) of meat(s) and cheese(s).
4-Top with veggies.
5-Assemble the top half of the loaf.
6-Cut to your desired size and number of sandwiches.
7-Serve and enjoy!

One Ciabatta Loaf = Multiple Sandwiches!
To create a tasty toasted ciabatta sandwich, place both halves of the bread (after the meat and cheese are in place, but before adding the veggies) in the oven under the broiler for 2-3 minutes. Remove from heat, top with veggies, cut and serve!

Tasty and Toasty Ciabatta Sandwich
This sandwich was a conversation starter among my new classmates during my course and it was extremely filling to eat for lunch. It also works well at sandwich parties or potlucks, where there are lot of fun ingredient combinations to play with. We brought some ciabatta to a recent gathering of sandwich lovers (friends) and they were a big hit there too.

So give it a try with your favorite ingredients and when someone asks you about your sandwich, because they will, tell them it’s all in the ciabatta bread and help them pronounce it correctly.


Just don’t talk with your mouth full!

Upside-down Ciabatta Goodness.

Sunday, June 1, 2014

Thinking Outside the Bread Box – The Versatile Tortilla

Versatility, thy name is Tortilla.

This statement may come across as overdramatic, but it’s completely true.

The Tortilla is an impressively adaptable substitute for bread for sandwich-type endeavors. This makes sense considering tortillas have been around since the time of the Aztecs. They are traditionally made from corn dough called masa, shaped by hand and seared each side on a hot griddle. Today they come in all sizes and flavors – whole wheat, three cheese, sundried tomato, spinach, etc. -  and they can be stuffed with anything, hot or cold, and shaped into whatever configuration suits your taste.

Versatile tortillas use versatile ingredients.
To prove this and to celebrate the fun and flexibility of the Tortilla, I present you with three different tortilla experiences: a Wrap, a Quesadilla and a Burrito. These three tortilla-based meals can be made with very similar ingredients, depending on what you feel like. If you can't decide which one to make, there's nothing stopping you from making all three at once. Just be creative with what you have and go for it!

The Ranch Chicken Salad Wrap needs:
-Tortillas, any flavor will do
-Romaine or Iceberg lettuce, washed and torn into small bits
-Cooked chicken breast, chopped into small pieces
How stuffed can wraps get?
-Tomatoes, diced
-Red peppers, sliced
-Parmesan cheese, grated
-Ranch Salad Dressing

Prep:

1-Toss the lettuce, chicken, tomatoes and ranch dressing.
2-Spoon the salad mixture into a line down the centers of the tortillas.
3-Sprinkle with Parmesan cheese and add slices of red pepper.
4-Fold up the bottom of the tortilla to the centre and fold the outer ends over each other, leaving one end open.
5-Carefully place the wrap on a plate, folded side down, to keep everything together.
6-Eat it carefully to avoid it coming unwrapped. Enjoy! 

All wrapped up in tortilla goodness.
Two layers of grated cheese tops this quesadilla.
Since wraps are incredibly quick and easy to make, the hardest part will be deciding what to put in yours! Experiment with different fillings, hot or cold, and see how stuffed you can make them. There is another folding technique that completely closes the wrap off, which can be good if the one you’re making is double-stuffed and needs the extra containment. I personally prefer the open end because I can easily top it off with extra wrap stuffing.  Just like the tortillas that hold them all together, wraps are deliciously multipurpose and underrated. 


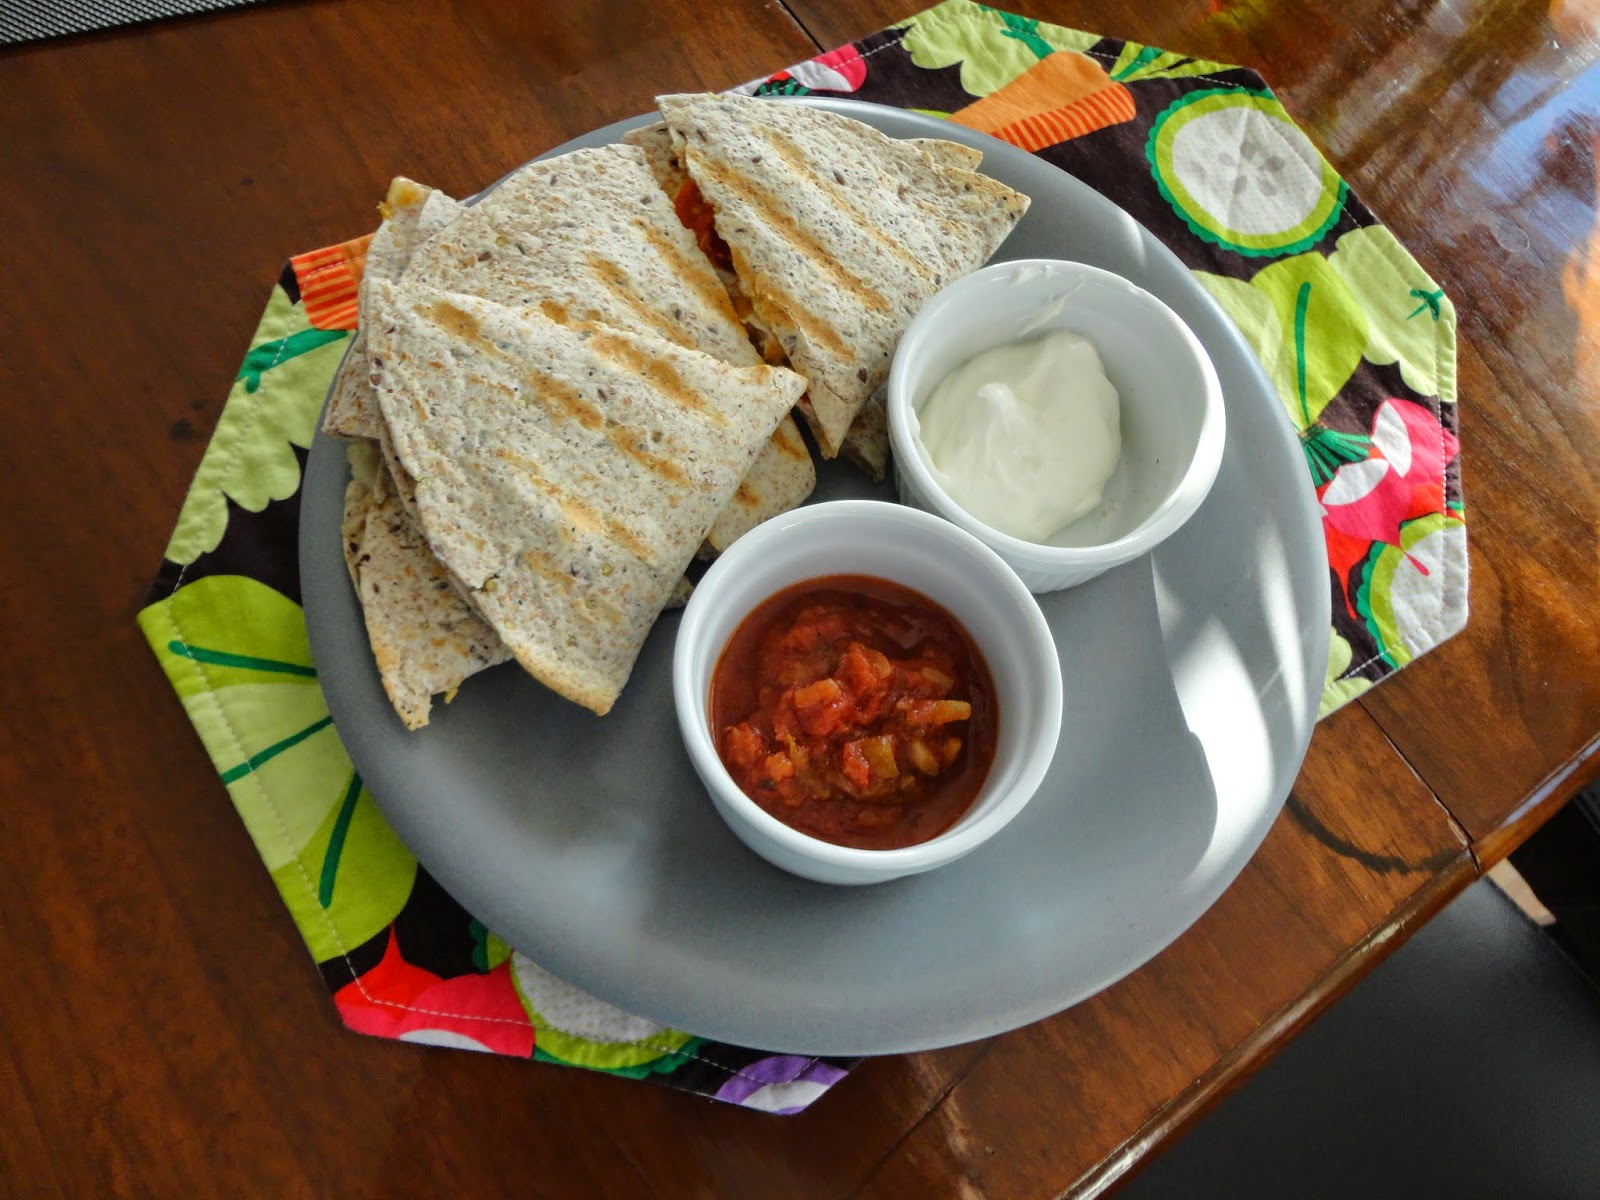
The Spicy Chicken Quesadilla needs:

-Tortillas, any flavor will do
-Cooked chicken breast, seasoned to your liking and chopped into small pieces
-Cheddar and mozzarella cheese, grated
-Red or green peppers, diced
-Tomatoes, diced
-Banana peppers or *Jalapenos (if you dare!), diced
*If you are chopping up jalapeno peppers, be very careful not to touch your face, especially your eyes, when handling jalapenos! Wash your hands and chopping station thoroughly to avoid unnecessary pain and suffering. Canned jalapenos are a safe alternative as well.*
-Sour cream
-Salsa
-Guacamole (store bought or try making it yourself!)

Prep:

1-Sprinkle a thin layer of grated cheese on half a tortilla.
2-Pile on the chicken, peppers/jalapenos and tomatoes.
3-Top with one more layer of grated cheese.
3-Fold the tortilla in half and carefully place it on a hot Panini press for 3-4 minutes.
4-Remove from heat when golden grill marks are visible and the insides are melted.
5-Slice the quesadilla into triangles and serve with sides of salsa and sour cream. 

Complete with salsa and sour cream. Guacamole is also a good side.
This Quesadilla makes a filling meal or satisfying snack. I like to season the chicken with some chili or cayenne pepper for some extra oomph. The spicy banana peppers are my favorite part; since I’m not quite ready to go all out with jalapenos, they add some heat without the complete searing of taste buds and don’t make downing ice water a requirement for enjoying this meal. 


Go as spicy as you want!

The Bean Burrito needs:

-Tortillas, any flavor will do
-1-2 cups cooked rice
-1 can of a Bean Medley (red kidney beans, chick peas, etc.)
-1 Tbsp olive oil
-1 small onion, diced
-1 Tbsp minced garlic
-1-2 tsp chili or chipotle pepper (depends how spicy you want it)
-2 tsp cumin
-Sharp cheddar cheese, grated
-Red, green or yellow peppers, diced
-spinach (optional; depends how stuffed you want it)

Stuffed to the brim with rice, beans and veggies.
Prep:

1-Cook the rice per the instructions (if using a rice cooker, make sure you add enough water and a little oil, to avoid the rice drying out/getting crunchy)
2-Add the oil into a heated skillet and sauté the garlic and onion until soft, about 5 minutes.
3-Rinse the beans and add to the oil, garlic and onion.
4-Add the spices and mix to coat the beans evenly. Cook for another 5 minutes or so.
5-Scoop the rice and beans into a line in the center of your tortillas.
6-Pile the veggies and sour cream on top.
7-Carefully fold the bottom up to the centre and fold the outer end over each other.
8-Flip and place folded side down to seal it.
9-Enjoy!

This bean burrito adds a vegetarian option that’s super filling and very healthy.  Experiment with your favorite spices and vegetable toppings to make yours truly unique. You might even want to try seasoning the rice with a splash of lime juice and some chopped fresh cilantro (excellent flavors!). If you're not into beans - you should be because they're tasty and extremely good for you - season chicken or slices of steak with the same spices.


Whether you make it into a wrap, a grilled quesadilla or burrito, your tortilla is sure to please because versatility makes any sandwich experience fun and uniquely yours.

Tuesday, March 25, 2014

Thinking Outside the Bread Box - The Bagel

Fresh from my inaugural visit to the New York Bagel Café, I am inspired by bagels and their sandwich-making possibilities!
  
Toasted, untoasted, with cream cheese, jelly, butter or bare, open or closed faced - what I love about bagels is how limitless they are!

Check out any bagel shelf of any bakery and chances are you won’t see just one kind of bagel - there’s whole wheat, sesame, cinnamon-raisin, pumpernickel, poppy-seed, onion...full-sized or mini...assorted. It’s so hard to choose just one kind!

Exquisite Hendrickson Bagels!
Thankfully, the Everything bagel takes care of that. 

With a crispy topping of poppy-seeds, chunks of garlic and onions, it really does have a bit of everything, just like the name suggests. It’s great with plain butter or cream cheese alone, or piled high with meat, cheese, veggies or all of the above. It is definitely my go-to bagel but for this bagel-sandwich to be truly blog-worthy, it couldn’t be just any Everything bagel…

It had to be a Hendrickson Bagel, known more generally as an Old Strathcona Farmer’s Market Bagel!

I love the Farmer’s Market bagels! You may have to fight your way through the packed Saturday-morning crowds to get their stall, but once you do, they are so worth it! They are fresh from Sherwood Park, contain no artificial additives and no nuts! So stock up on these beauties, my fellow nut-allergy people!  Eat them with total peace of mind!

The Hendrickson version of the Everything Bagel is simply titled ‘Onion, Garlic, Sesame, Poppy’ and they have big hunks of all these great things on their golden tops. They smell so good and are soft and chewy, even when toasted. Eat them within three days of buying, or pre-slice and freeze them to extend their shelf life.  And don’t forget to grab an exciting flavor of fresh cream cheese while you’re there!

From the six bagels I bought, two had the honour of becoming beautiful sandwiches of different varieties: two open-faced, one closed.  All three are delicious bagel options I am proud to recommend to you!

2 Bagels, 3 Different Bagel-Sandwiches needs:

-2 Bagels
-Mustard
-Mayo
-Spicy pastrami
-Smoked prosciutto
-Provolone
-Strong Cheddar
-Hot Banana Peppers
-Cream cheese: spinach and feta from Hendrickson’s and the plain Philadelphia kind
-Carrots, shredded
-Red Pepper, sliced
-Red Pepper and Garlic Jelly (mine was homemade by my mother-in-law! Check out the jams and jellies at Anneliese’s Crafts at the Farmer’s Market for something similar.)
-Fresh-ground Pepper and Sea Salt

Toasted bagel, two meats and two cheeses goodness!
#1 -Toasted Pastrami, Prosciutto, Cheddar and Provolone

1-Slice a bagel and spread one half with mustard and mayo

2-Pile on the spicy pastrami, provolone, prosciutto and cheddar

3-Toast both halves in the toaster oven on medium, until cheese is melted and the other bagel half is golden brown

4-Add some hot banana peppers, combine the bagel halves, cut and enjoy!

This is a very nice combination of spicy, smokey and salty meat with the sharp provolone and strong cheddar. The peppers add some heat to a pleasantly warm and gooey blend of meat and cheese.  

#2 and #3 - Open-Faced Veggie and Meat Bagels:

Veggie:

1-Toast the bagel
2-Spread one half with a thick layer of spinach and feta cream cheese
3-Top with shredded carrot and slices of red pepper
4-Sprinkle some fresh ground pepper and sea salt on top

Meat:

1-Spread one half with plain cream cheese
2-Top with red pepper and garlic jelly
3-Fold a piece of prosciutto and place on the cream cheese and jelly spread
4-Enjoy!

The cream cheese has big pieces of spinach, which adds a different texture to this bagel.  The spinach and feta is a bold flavor combo that’s balanced out by the crisp veggies. The pepper and salt on top add a nice tang to the vegetables as well.  A thick slice of beefsteak tomato would also do nicely instead of, or in addition to, the red pepper. 
Can't go wrong with half veggie, half meat!

On the meat half, the jelly is both sweet and spicy and works well with the smoky prosciutto. The cream cheese and jelly melt well together on the toasted bagel half, so it’s a bit of a gooey, and chewy but tasty mess. 

So for your next sandwich, bypass the standard bread and go for something a bit different instead. These three bagel sandwiches show that with some creativity in mixing and combining your ingredients, you can have your bagel and eat it too!

Some extra Bagel facts to snack on:

-The bagel’s holey design suggests a desire to make this kind of food easily transportable as “it's possible to thread such a roll on a stick or a string” and take it to-go. (A Short History of The Bagel, www.slate.com)

-Bagels are boiled and then baked, a process which helps them to last longer because their exteriors become harder than other breads. (A Short History of The Bagel, www.slate.com)

-Bagels are delicious but slicing them can also cause severe injuries if you’re not careful!  Apparently, “1,979 people [went to emergency rooms] with BRI (bagel related injuries)…in 2008”!  (Newman, Barry. To Keep the Finger Out of Finger Food, Inventors Seek a Better Bagel Cutter, The Wall Street Journal, December 2009)

-If you enjoy kitchen gadgets, you may want to invest in a bagel slicer to minimize your risk of BRI. But if slicing a bagel without one really makes you feel alive, at least be smart about it and don’t hold it in your hand while you cut!  Place it on a flat surface, hold it down with one hand and carefully slice through the bagel horizontally. (http://homecooking.about.com/)